Table of Contents
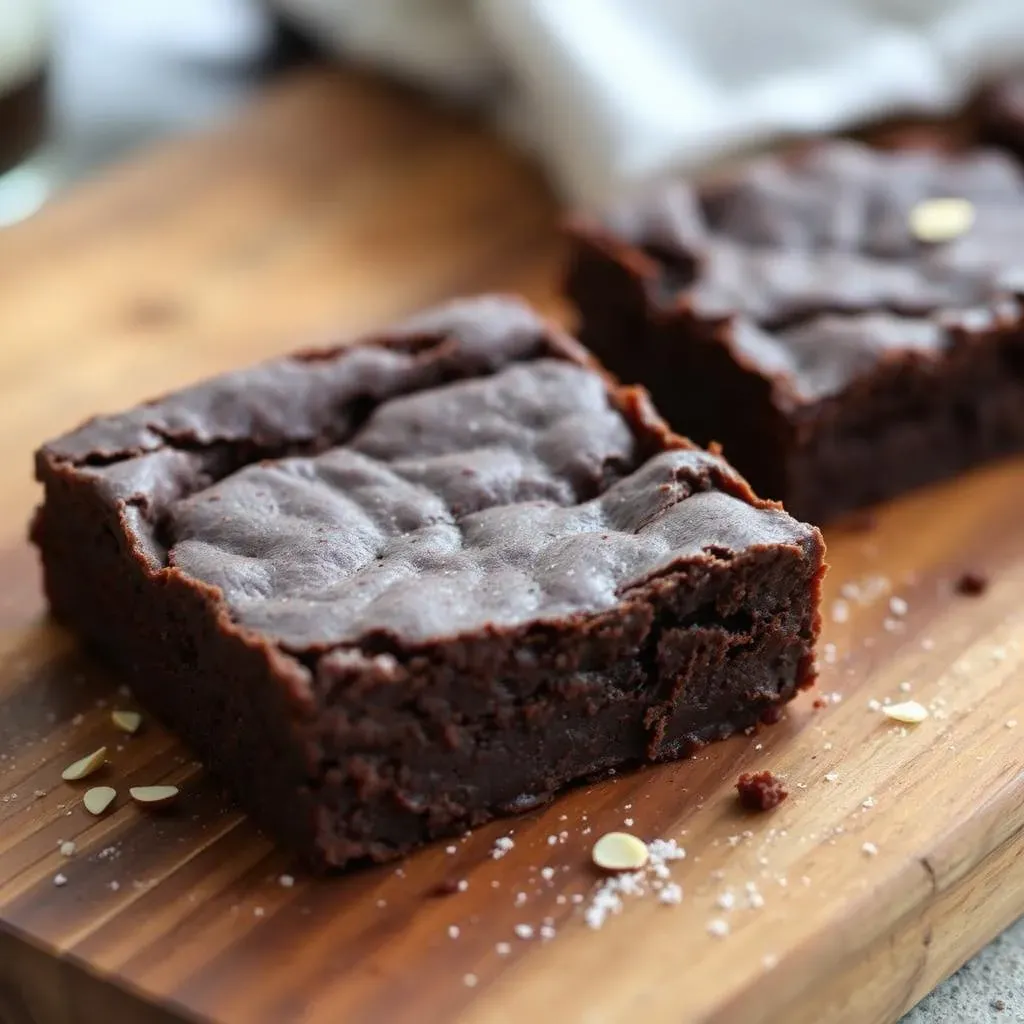
Ever dream of sinking your teeth into a rich, gooey brownie without the gluten? Me too! That's why I went on a quest to create the ultimate gluten free brownies with almond flour. Forget those dry, crumbly disappointments. We're talking intensely chocolatey, melt-in-your-mouth squares of pure bliss. This isn't just another recipe; it's a game-changer for anyone who loves brownies but needs to avoid gluten. We’ll explore why almond flour is the secret weapon for achieving that perfect fudgy texture, walk through the easy step-by-step instructions, and share all my best tips and tricks for making sure your brownies turn out amazing every single time. Get ready to bake some seriously delicious, gluten free brownies with almond flour that will impress everyone (even the gluten-lovers!). We will also cover some variations, so you can customise your brownies to your taste.
The Magic of Almond Flour in GlutenFree Brownies
The Magic of Almond Flour in GlutenFree Brownies
Why Almond Flour Rocks
Okay, so you're probably wondering, "Why almond flour?" Well, let me tell you, it's not just a trendy gluten-free alternative. This stuff is a game changer! Unlike regular wheat flour, almond flour is made from ground almonds, which gives it a naturally moist and slightly nutty flavor. This means your brownies won’t be dry and boring. Instead, they become incredibly fudgy, with a satisfyingly dense texture that's hard to resist. Plus, it's packed with healthy fats and protein, so you can feel a little bit better about indulging (a little!).
Think of it like this: wheat flour is like a sponge, soaking up moisture and sometimes leaving you with a dry, cakey mess. Almond flour is more like a rich, creamy butter, adding moisture and depth to your brownies. It's the difference between a desert and a dessert you will dream about. It's also naturally gluten-free, which is awesome for anyone with dietary restrictions or just trying to cut back on gluten. It's also a great option for anyone that is doing a paleo diet.
Flour Type | Texture | Flavor | Gluten |
|---|---|---|---|
Wheat Flour | Can be dry, cakey | Neutral | Yes |
Almond Flour | Fudgy, dense, moist | Nutty, rich | No |
The Fudgy Factor
The real magic of almond flour lies in its ability to create that perfect fudgy texture. You know, the kind that makes your eyes roll back in your head with every bite. Because almond flour is high in fat, it helps to keep the brownies incredibly moist and prevents them from drying out, even after they cool. This is a huge win for us brownie lovers! You can forget about those crumbly, disappointing gluten-free brownies.
It's also super easy to work with. You don't need any fancy techniques to get the hang of it. Just combine it with your other ingredients and you're good to go. Plus, it adds a subtle sweetness that complements the chocolate perfectly. Honestly, once you try brownies made with almond flour, you might never go back to the regular stuff. It's that good. You have been warned.
- Almond flour is high in fat, which keeps brownies moist.
- It creates a dense, fudgy texture.
- It has a subtle sweetness that complements chocolate.
- It's easy to use and doesn't require special techniques.
StepbyStep: Baking Your Own GlutenFree Almond Flour Brownies
StepbyStep: Baking Your Own GlutenFree Almond Flour Brownies
Get Your Ingredients Ready
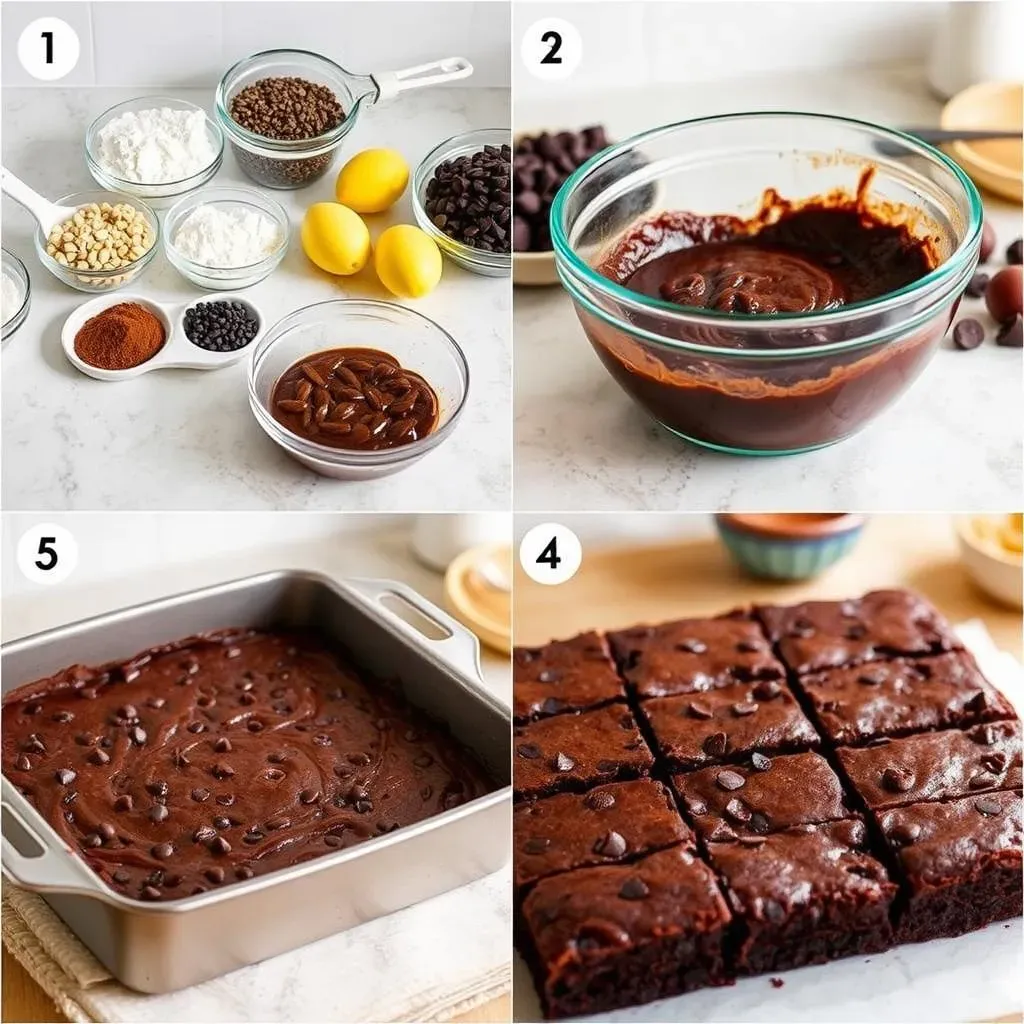
Alright, let's get down to business. Before you even think about preheating your oven, make sure you've got all your ingredients lined up and ready to go. This is a crucial step because once you start, things move pretty quickly. You'll need almond flour (remember, not almond meal!), unsweetened cocoa powder, some kind of sweetener (I like coconut sugar, but regular sugar works too), eggs, melted butter (or coconut oil for dairy-free), vanilla extract, and of course, chocolate chips. I prefer dairy free chocolate chips, but use what you like. Don't forget a pinch of salt to balance the sweetness.
Think of it like preparing for a race – you wouldn't start without your shoes tied, right? Same goes for baking. Having everything measured and ready will make the whole process smoother and way more enjoyable. Plus, it prevents that dreaded moment when you realize you're out of something halfway through. Trust me on this one, I've been there and it's not fun.
Ingredient | Why It's Important |
|---|---|
Almond Flour | Provides structure and fudginess |
Cocoa Powder | Adds rich chocolate flavor |
Sweetener | Balances the bitterness of cocoa |
Eggs | Binds the ingredients |
Melted Butter or Coconut Oil | Adds moisture and richness |
Vanilla Extract | Enhances flavor |
Chocolate Chips | For extra chocolatey goodness |
Salt | Balances sweetness |
Mixing and Baking
Now for the fun part! In a large bowl, whisk together your dry ingredients: the almond flour, cocoa powder, sweetener, and salt. Make sure everything is well combined. In a separate bowl, whisk together the melted butter (or coconut oil), eggs, and vanilla extract. Now, pour the wet ingredients into the dry ingredients and mix until everything is just combined. Don't overmix, you don't want tough brownies. Finally, gently fold in your chocolate chips.
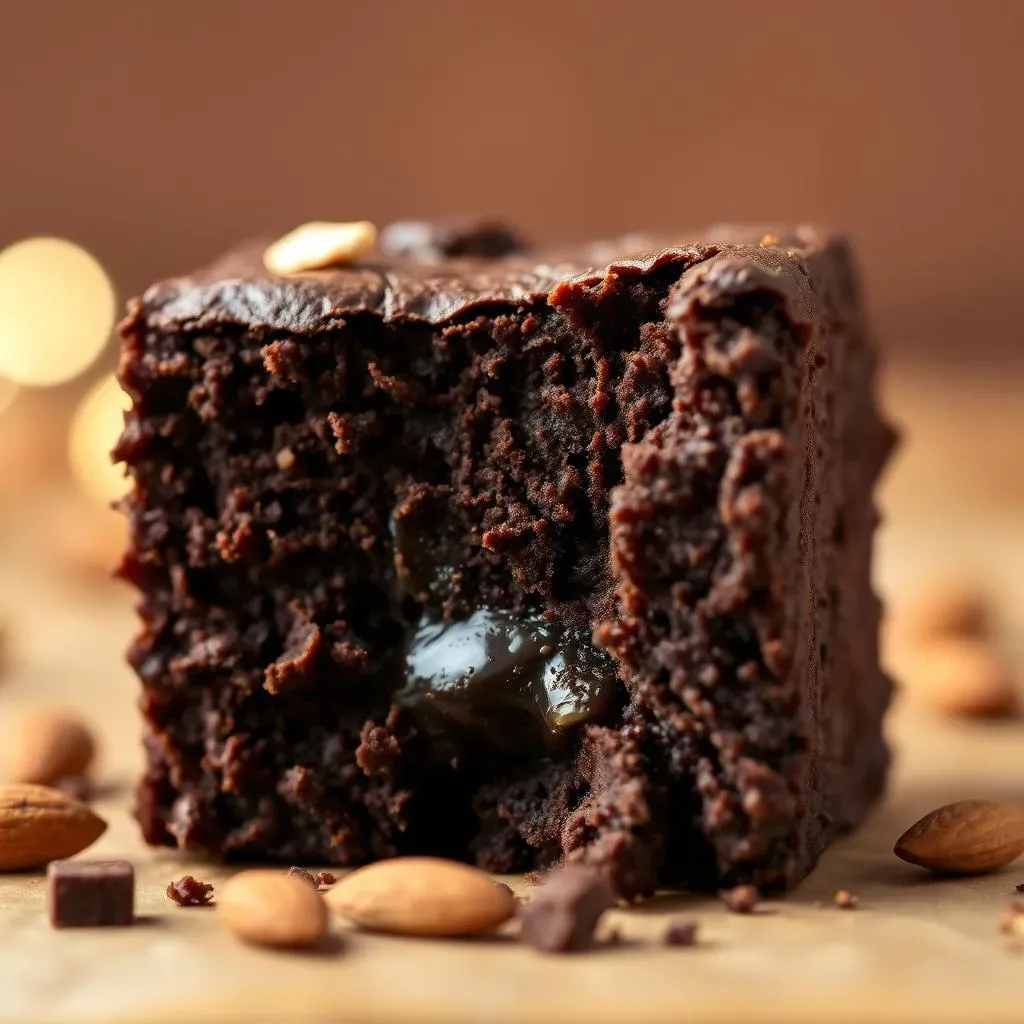
Pour the batter into a lined baking pan (I like to use parchment paper for easy removal) and spread it evenly. Pop it into your preheated oven, and bake for about 20-25 minutes. The edges should be set, but the center should still be a little gooey. This is important, because the brownies will continue to set as they cool. Let them cool completely in the pan before cutting into them. If you try to cut them while they are still warm, they will fall apart.
Cooling and Serving
Patience is key here. I know it's tempting to dig into those warm, chocolatey squares right away, but trust me, they're worth the wait. Letting the brownies cool completely in the pan is crucial for them to set properly. This will prevent them from being too gooey and will make them easier to cut. Once they're cool, you can cut them into squares and get ready to enjoy the fruits of your labor.
These gluten-free almond flour brownies are delicious on their own, but feel free to get creative with toppings. A dusting of powdered sugar, a scoop of dairy-free ice cream, or a drizzle of chocolate sauce will take them to the next level. Or, you can be like me, and eat them as is, because they are perfect. You can store any leftovers in an airtight container at room temperature, in the fridge, or even in the freezer for a longer shelf life.
- Let the brownies cool completely before cutting.
- Dust with powdered sugar or add ice cream.
- Store in an airtight container.
- Enjoy your perfect gluten-free brownies!
Tips, Tricks, and Variations for Perfect GlutenFree Brownies
Tips, Tricks, and Variations for Perfect GlutenFree Brownies
Baking Tips for Brownie Perfection
Okay, let's talk secrets. You know, the little things that can take your gluten free brownies with almond flour from good to "OMG, these are amazing!" First off, don't skip lining your pan with parchment paper. Seriously, this is a lifesaver when it comes to removing those fudgy squares without them sticking or falling apart. Also, make sure you're using blanched almond flour, not almond meal. Almond meal is coarser and will result in a gritty texture, and nobody wants that. It might be a little more expensive, but trust me, it's worth it.
Another tip is to not overmix the batter. Overmixing can develop the gluten in the flour (even though almond flour is gluten free, there's some science behind it), resulting in tough brownies instead of fudgy ones. Mix until everything is just combined, then stop. Also, oven temperatures vary, so keep an eye on your brownies. Start checking for doneness around the 20-minute mark. They should be set around the edges but still slightly gooey in the center. Remember, they will continue to cook as they cool, so it's better to pull them out a little early.
Tip | Why It Matters |
|---|---|
Use parchment paper | Prevents sticking and makes removal easy |
Use blanched almond flour | Ensures a smooth texture |
Don't overmix the batter | Prevents tough brownies |
Watch your baking time | Prevents overbaking |
Fun Variations to Try
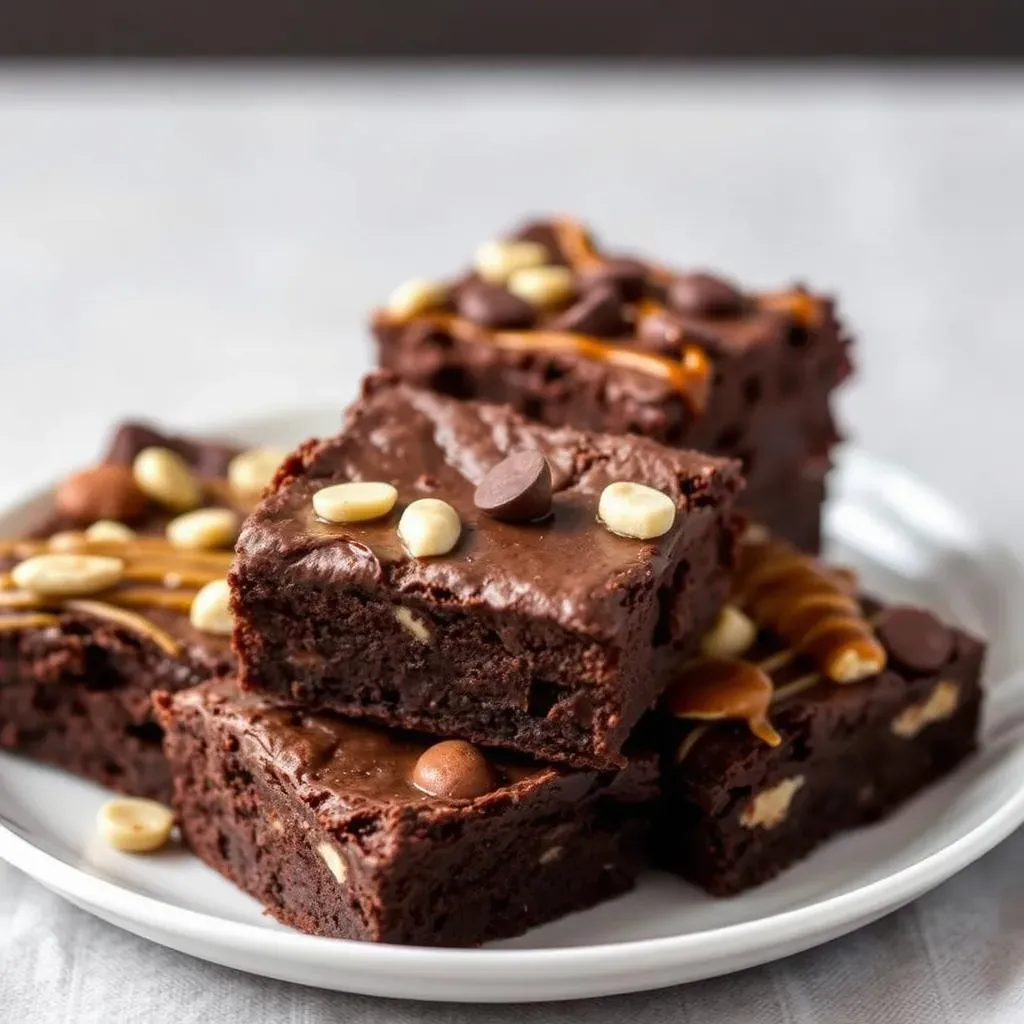
Now, let's get creative! Once you've mastered the basic gluten free brownies with almond flour recipe, the possibilities are endless. If you're a nut lover, try adding some chopped walnuts or pecans to the batter. For a chocolate overload, throw in some extra chocolate chips, or even some chunks of your favorite chocolate bar. Want to make it a bit more fancy? Add a swirl of peanut butter or a drizzle of caramel on top before baking. You can also add some espresso powder for a mocha flavor.
If you're feeling adventurous, try adding some chopped toffee bits or mini marshmallows to the batter. You can also sprinkle some sea salt on top for a sweet and salty kick. Or, for a totally different twist, try using white chocolate chips instead of dark chocolate. Don't be afraid to experiment with different flavor combinations and make these brownies your own. Just have fun with it! Baking should be enjoyable, and these brownies are the perfect canvas for your creativity.
- Add chopped nuts for texture.
- Mix in extra chocolate chips or chunks.
- Swirl in peanut butter or caramel.
- Sprinkle with sea salt for a sweet and salty flavor.
- Use white chocolate chips instead of dark.