Table of Contents
Okay, let's be real, who doesn't love a good brownie? But what if we took that classic chocolate goodness and cranked it up a notch? I'm talking about the magical combo of rich, fudgy chocolate and smooth, creamy peanut butter. Yes, my friends, we're diving headfirst into the world of brownies peanut butter! This isn't just about slapping some peanut butter on top; we're talking about a beautiful swirl, a dance of flavors that will make your taste buds sing. Get ready to bake up a batch of these irresistible treats. We will start with the key ingredients and equipment you'll need, then move on to the fun part: mixing and swirling. Finally, we will cover baking, cooling, and serving. So, grab your aprons, and let's get this peanut butter brownie party started. You're about to experience a whole new level of chocolate-peanut butter perfection. Prepare for a dessert that's both easy to make and impossible to resist.
Peanut Butter Brownies: Gathering Your Arsenal
Peanut Butter Brownies: Gathering Your Arsenal
The Chocolate Champions
First things first, let's talk chocolate. We're not messing around with just any old cocoa powder here. For these peanut butter brownies, you want the good stuff. I'm talking about high-quality dark chocolate, the kind that melts into a rich, velvety pool of deliciousness. Think of it as the base of our masterpiece, the deep, dark canvas on which we'll paint our peanut butter swirls. You can use chocolate chips, chopped chocolate bars, whatever floats your boat, just make sure it's something you'd happily eat straight from the package. Trust me, the better the chocolate, the better the brownie.
The Peanut Butter Powerhouse
Next up, the star of our show: peanut butter. Now, I'm a firm believer in creamy peanut butter for this recipe. It blends so smoothly into the batter and creates the most beautiful swirls. But hey, if you're a chunky peanut butter fan, go for it! Just be aware that the texture might be slightly different. The key here is to use a good quality peanut butter, the kind that has that deep, roasted peanut flavor. Avoid the overly processed stuff, you know the ones where the oil separates easily. We want pure, unadulterated peanut butter goodness.
Ingredient | Why it Matters |
|---|---|
High-Quality Dark Chocolate | Creates a rich, deep flavor base |
Creamy Peanut Butter | Blends smoothly and creates beautiful swirls |
Room Temperature Eggs | Mixes better and ensures a smooth batter |
Sugar and Butter | Adds moisture and sweetness |
The Supporting Cast
Alright, now for the supporting players. We need some eggs, but make sure they're at room temperature. This helps them mix better into the batter. Then, of course, we need sugar – a mix of granulated and brown sugar is perfect for that fudgy texture. And let's not forget the butter, it adds moisture and richness. You'll also need some flour, and a dash of salt to balance the sweetness. And that’s pretty much it for the ingredients. Now, for the equipment, don't worry, it's nothing fancy. You just need a standard 8x8 inch baking pan, some mixing bowls, and a spatula. See? Nothing complicated, just good old-fashioned baking tools.
Mixing and Swirling: The Peanut Butter Brownies Dance
Mixing and Swirling: The Peanut Butter Brownies Dance
Melting the Chocolate
Alright, let's get this show on the road! We'll start by melting our chocolate. You can do this in a double boiler, or if you're like me and prefer the microwave, that works too. Just make sure to do it in short bursts, stirring in between, so you don't burn it. Once it's all smooth and melted, set it aside to cool slightly. We don't want to cook our eggs when we add them later. It's like giving our chocolate a little spa treatment before it gets to be the main part of our peanut butter brownies.
Creating the Batter
Now for the fun part, mixing the batter! In a large bowl, combine the melted butter and sugars. Mix it all together until it's nice and creamy. Then, add those room-temperature eggs one at a time, mixing well after each addition. This is where patience comes in. Once the eggs are in, gently fold in that cooled melted chocolate. Now, in another bowl, whisk together the flour and salt, then gradually add it to the wet ingredients. Be careful not to overmix, just mix until everything is just combined. Overmixing can make the brownies tough, and we want them to be fudgy, right? We're aiming for a smooth, luxurious batter, ready for the peanut butter magic.
Step | Action | Why |
|---|---|---|
1 | Melt chocolate | Creates a smooth base |
2 | Mix butter and sugars | Adds moisture and sweetness |
3 | Add eggs one by one | Ensures smooth mixing |
4 | Fold in chocolate and dry ingredients | Prevents overmixing |
The Swirl Technique
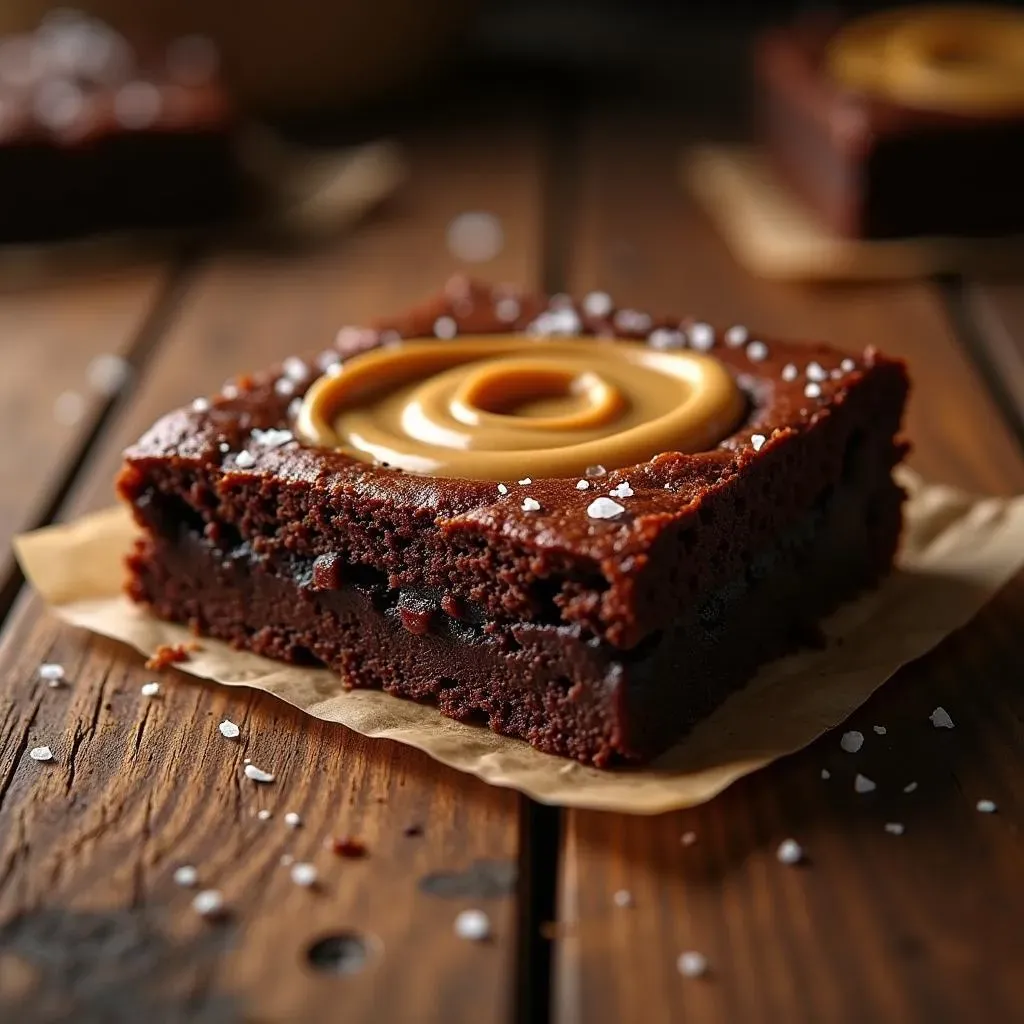
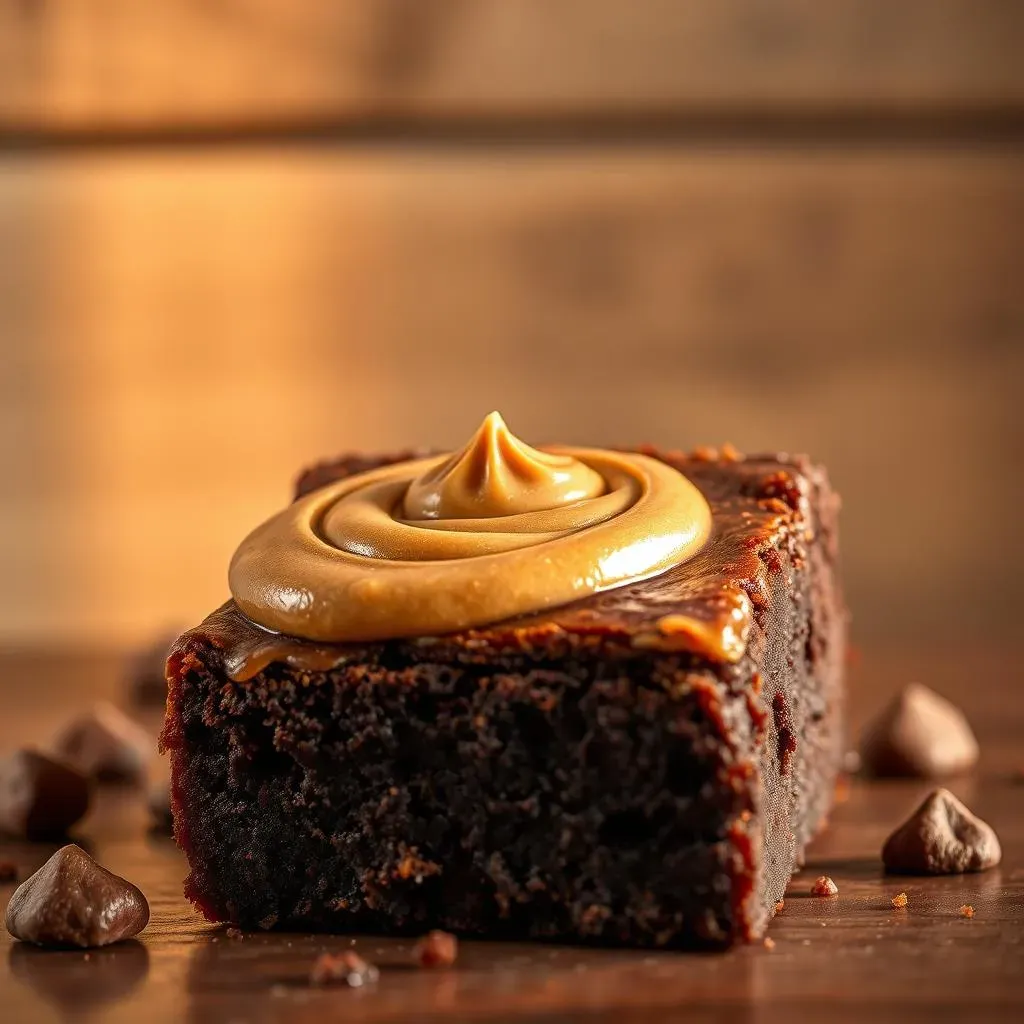
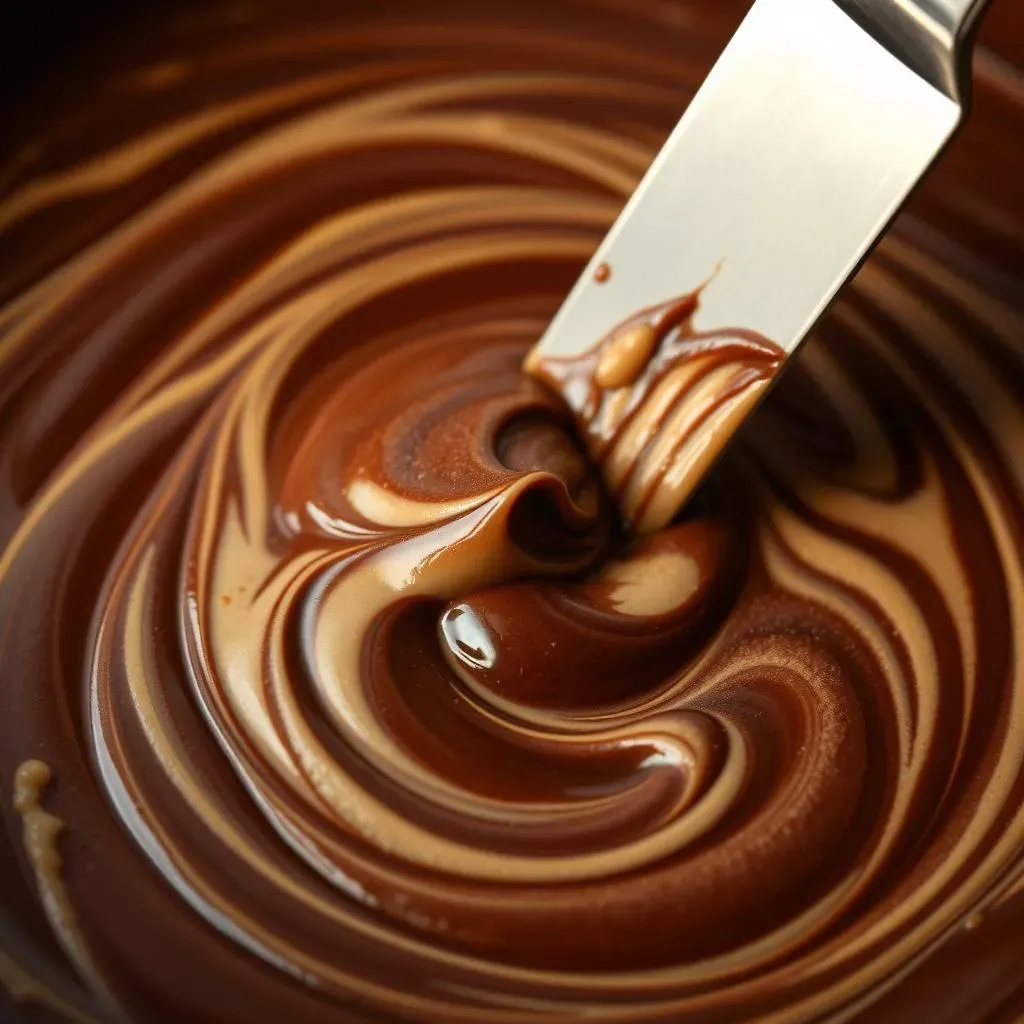
Finally, the grand finale – the swirl! Pour half of the brownie batter into your prepared pan. Now, dollop spoonfuls of peanut butter over the batter. Don't be shy, we want plenty of that peanut butter goodness. Then, pour the rest of the batter on top. Now, take a knife or a skewer and swirl it through the batter, creating a beautiful marbled effect. Don't overdo it though, a few swirls are enough. You want those pockets of peanut butter to remain visible. This is where your artistic side comes out, so go wild and create those beautiful swirls. It's like making edible art, and the best part is, it tastes amazing!
Baking, Cooling, and Serving Your Perfect Peanut Butter Brownies
Baking, Cooling, and Serving Your Perfect Peanut Butter Brownies
Baking to Perfection
Alright, our peanut butter brownies are all swirled and ready to go. Now it's time for the oven magic. Preheat your oven to 350°F (175°C) and pop that pan in. The baking time is crucial here. You want the edges to be set and the center to be slightly gooey. For a truly fudgy brownie, I usually bake them for about 30-35 minutes. If you prefer a more cake-like texture, you can go closer to 40 minutes. Keep an eye on them though, every oven is different. A toothpick inserted into the center should come out with a few moist crumbs attached, not completely clean. This means they're perfectly baked. It's like a science experiment, but the result is a delicious reward.
The Cooling Down Process
Once your brownies are baked, resist the urge to cut into them right away! I know it's tempting, but trust me, you'll get better results if you let them cool in the pan for at least an hour. This allows them to set properly and become even more fudgy. After they've cooled a bit, you can carefully lift them out of the pan using the parchment paper overhang (if you used it). Then, place them on a wire rack to cool completely. This is the hard part, the waiting game. But remember, good things come to those who wait. And these peanut butter brownies are definitely worth the wait.
Baking Stage | Time | Result |
|---|---|---|
Baking | 30-35 minutes (fudgy) or 40 minutes (cake-like) | Set edges, slightly gooey center |
Cooling in pan | 1 hour | Brownies set properly |
Cooling on wire rack | Until completely cool | Ready to cut and serve |
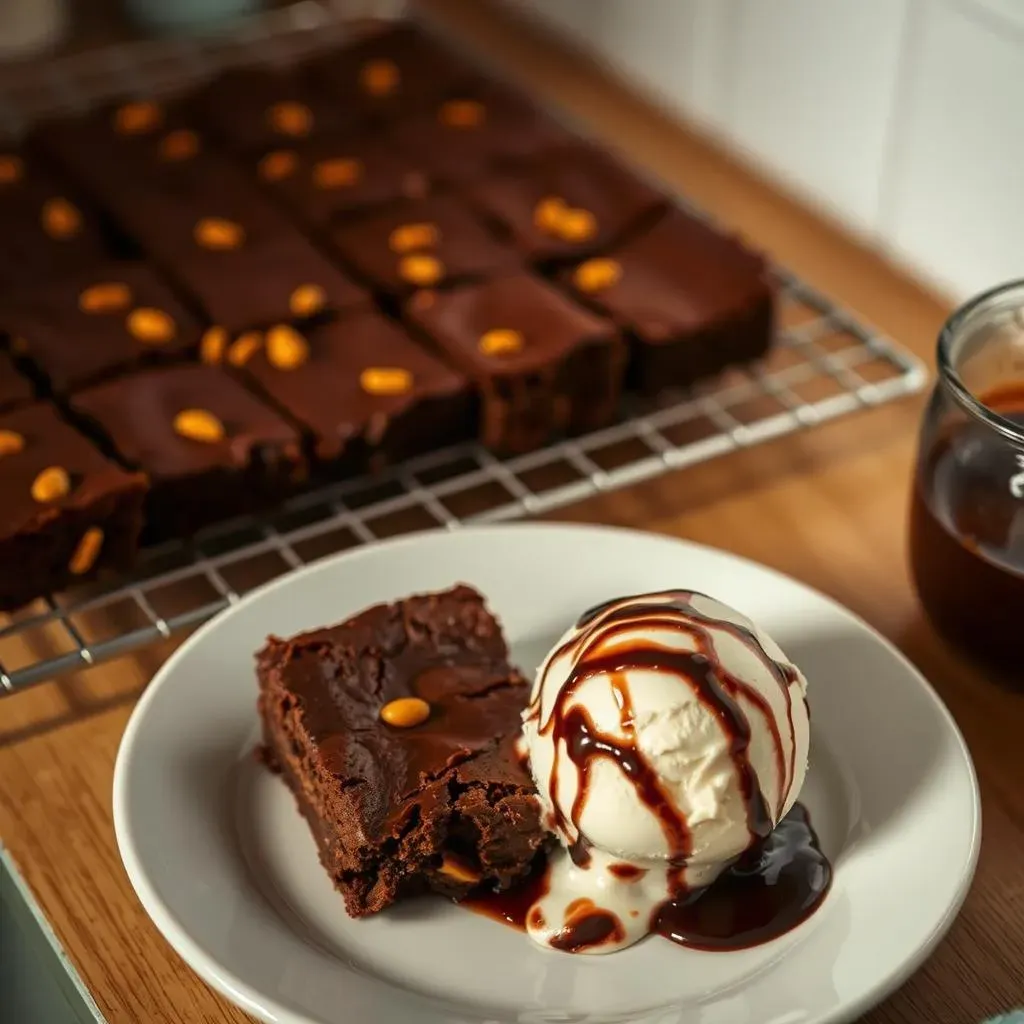
Serving and Storing Your Masterpiece
Finally, the best part – serving! Once your peanut butter brownies are completely cool, you can cut them into squares. I like to use a sharp knife and wipe it clean between each cut for nice, clean edges. Now, you can serve them as they are, or you can get fancy and add a scoop of vanilla ice cream, a drizzle of chocolate sauce, or even a sprinkle of sea salt. The options are endless! If you have any leftovers (which is unlikely, trust me), you can store them in an airtight container at room temperature for 3-4 days, or in the refrigerator for up to a week. They also freeze well, just wrap them tightly in plastic wrap and foil, and they'll be good for up to three months. But let's be honest, they probably won't last that long.