Table of Contents
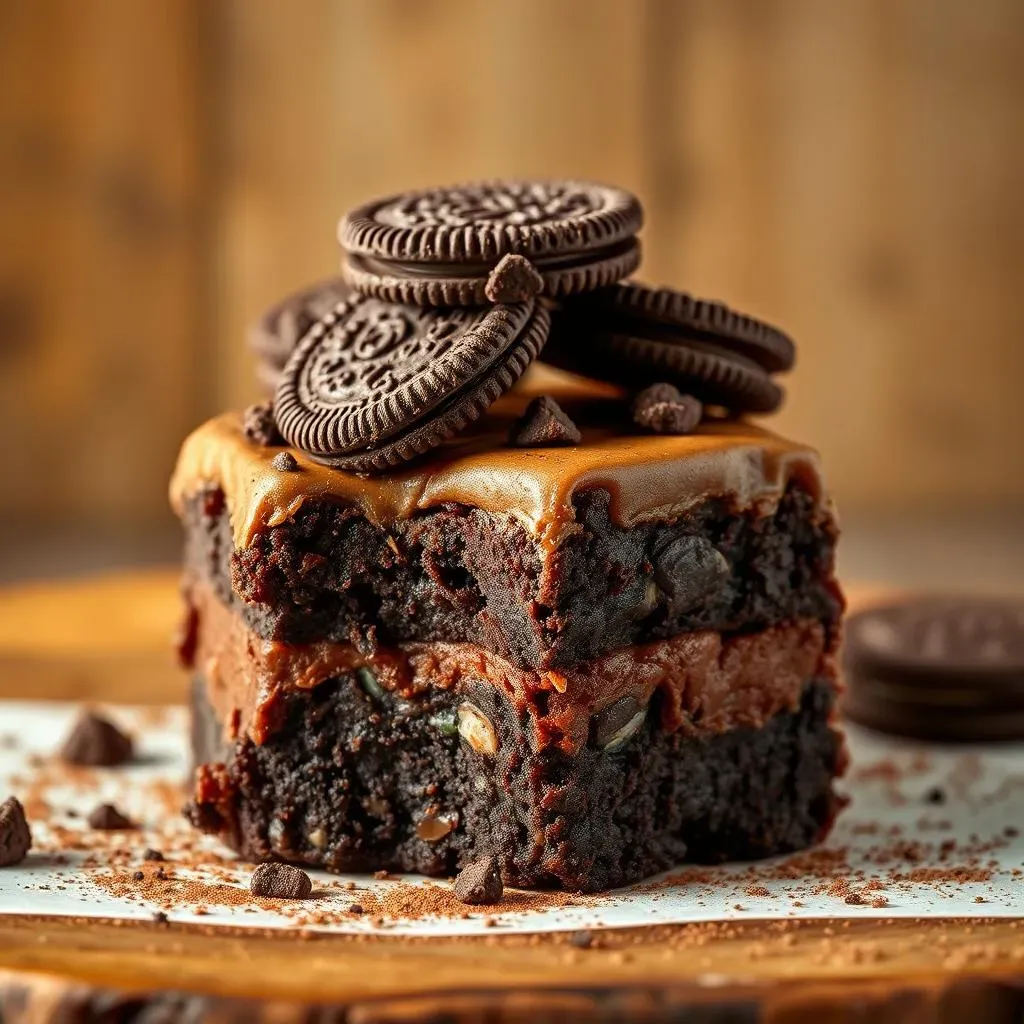
Let's be honest, who can resist a good brownie? Now, imagine taking that fudgy goodness and stuffing it with everyone’s favorite sandwich cookie: Oreos. That's what we're diving into today with this incredibly easy brownies and oreos recipe. This isn't your average, run-of-the-mill dessert; it's a delightful combination of rich, chocolatey brownie and the satisfying crunch of an Oreo. I've been baking these for years, and trust me, they're always a hit. Whether you're a seasoned baker or just starting out, this recipe is designed to be foolproof. We’ll cover everything from the simple ingredients you’ll need, to step-by-step instructions, and even some fun variations. Get ready to impress your friends and family (or just yourself) with this ultimate brownies and oreos recipe. It's so simple, even a kid can do it, and the results are always amazing. So, grab your apron, and let’s get baking!
Why This Brownies and Oreos Recipe is a Game Changer

Why This Brownies and Oreos Recipe is a Game Changer
The Simplicity Factor
Okay, let’s get real. Most brownie recipes? They can be a whole thing with melting chocolate, sifting flour, and a million ingredients. This brownies and oreos recipe? It's like the superhero of simplicity. We’re talking about starting with a box mix, which, let’s face it, is a total time-saver. And the best part? You’re basically just adding some eggs, oil, and then the star of the show – Oreos. No fancy techniques, no complicated steps, just pure, unadulterated baking ease. It’s perfect for those days when you want a delicious dessert but don't want to spend hours in the kitchen.
Plus, the whole "box mix" thing means even baking newbies can nail this. Seriously, if you can stir, you can make these brownies. It's the kind of recipe that makes you feel like a baking genius without actually having to be one. Think about it – you get all the satisfaction of homemade brownies with minimal effort. And who doesn't love that? This recipe is a game-changer because it makes baking approachable and fun for everyone, regardless of their skill level.
The Taste and Texture Triumph
Alright, let’s talk about the most important part – the taste. This brownies and oreos recipe isn’t just easy; it’s outrageously delicious. The fudgy, rich brownie base perfectly complements the slightly crunchy, creamy Oreo layer. It's a delightful combination of textures that will have your taste buds doing a happy dance. You get that intense chocolate flavor from the brownie, balanced by the sweet, vanilla-esque notes from the Oreos. It's like a party in your mouth, and everyone’s invited.
And it's not just about the flavor; the texture is spot-on. You’ve got the soft, gooey brownie, interspersed with the satisfying snap of the Oreo. It's a textural masterpiece that keeps you coming back for more. This isn't your average, boring brownie; it's an experience. The brownies and oreos combo elevates the humble brownie to a whole new level of deliciousness, making it a truly unforgettable dessert. That’s why it’s a game changer.
Feature | Why It's a Game Changer |
|---|---|
Simplicity | Easy to make, even for beginner bakers |
Flavor | Perfect balance of fudgy chocolate and sweet Oreos |
Texture | Combination of soft brownie and crunchy Oreos |
Time-Saving | Quick to prepare and bake |
Ingredients You'll Need for Your Oreo Brownies
Ingredients You'll Need for Your Oreo Brownies
The Brownie Base
Alright, let's gather our supplies for this masterpiece. First up, you'll need a box of your favorite brownie mix. Seriously, any brand will do – go with what you like. I usually grab the fudge kind for extra richness, but milk chocolate or dark chocolate work great too. You'll also need the usual suspects that the box calls for: eggs, oil, and water. Check the back of your box to see the exact amounts, as they can vary slightly. It's like following a map, but the destination is a batch of delicious brownies.
Now, don’t start thinking you need to get all fancy with the oil. Vegetable oil works perfectly fine, but you can also use canola oil. Just make sure you are using the right amount, because if you add too much oil, your brownies might end up a little greasy. We want them fudgy, not oily. The eggs should be large, not small, and always fresh. These are the keys to a moist, tender brownie base. This is going to be the foundation of our brownies and oreos recipe, so let's make it a good one.
The Oreo Stars
Now for the main event – the Oreos! You’ll need about 18-20 regular Oreos. Yes, the classic ones. But here's the fun part: you can totally mix it up. Want to use Double Stuf? Go for it. Mint Oreos? Absolutely! The world is your Oreo oyster. The only real rule is to try and keep them roughly the same size, we don’t want any massive chunks. I usually give them a little tap with my hand to break them into smaller pieces, but not too small, we want to see those beautiful Oreo chunks in the final product.
You can also try different flavors of Oreos to change things up, like Golden Oreos for a vanilla twist, or some of the crazy limited-edition flavors. It’s a super easy way to customize your brownies and oreos recipe. It all depends on how adventurous you are feeling. But for the first time, I would recommend sticking with the classic, just to get the hang of things. Then you can start experimenting with all the different flavors. And don't worry if you eat a few while you're prepping – I won't tell.
Ingredient | Quantity | Notes |
|---|---|---|
Brownie Mix | 1 Box | Any flavor you like |
Eggs | As per box instructions | Usually 2 Large |
Oil | As per box instructions | Vegetable or Canola |
Water | As per box instructions | Check the box |
Oreos | 18-20 | Any flavor, roughly chopped |
Optional Extras
Okay, so we have the basics covered, but if you're feeling a bit extra (and who isn't sometimes?), there are a few things you can add to really take your brownies to the next level. Chocolate chips are always a good idea. Milk chocolate, dark chocolate, white chocolate – they all work. About a cup of chips will do the trick. Or, if you’re into nuts, you can add chopped walnuts or pecans for a bit of crunch. I usually add a pinch of sea salt on top to enhance the chocolate flavor, it’s a little secret that makes a huge difference.
Another cool idea is to add a swirl of peanut butter on top before baking. Just dollop a few spoonfuls and use a knife to swirl it around. This adds a salty-sweet element that is seriously addictive. And if you're feeling really crazy, you can throw in some toffee bits or even a dash of instant coffee to intensify the chocolate flavor. These extras aren’t necessary, but they are fun, and can really make your brownies and oreos recipe your own. So don’t be afraid to experiment a little, you might just discover your new favorite addition.
StepbyStep: Making the Perfect Oreo Brownies
StepbyStep: Making the Perfect Oreo Brownies
Get Your Batter Ready
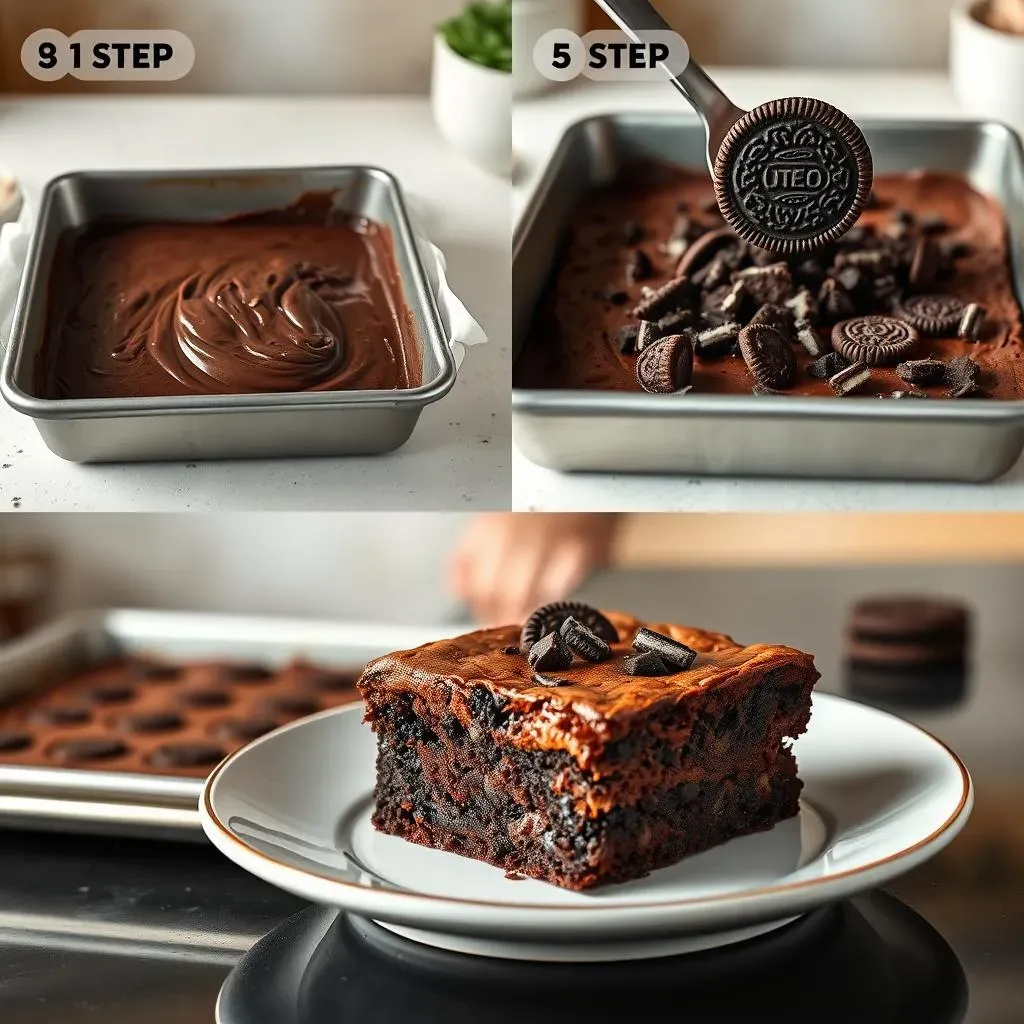
Alright, let's get down to business. First things first, preheat your oven to 350°F (175°C). While that's heating up, grab a 9x13 inch baking pan and line it with foil or parchment paper. This makes getting the brownies out a breeze, trust me. Now, in a large bowl, dump in your brownie mix, eggs, oil, and water. Mix it all together until everything is well combined. Don't overmix, just stir until there are no more streaks of dry mix. Overmixing can make your brownies tough, and nobody wants that. We want fudgy, not chewy!
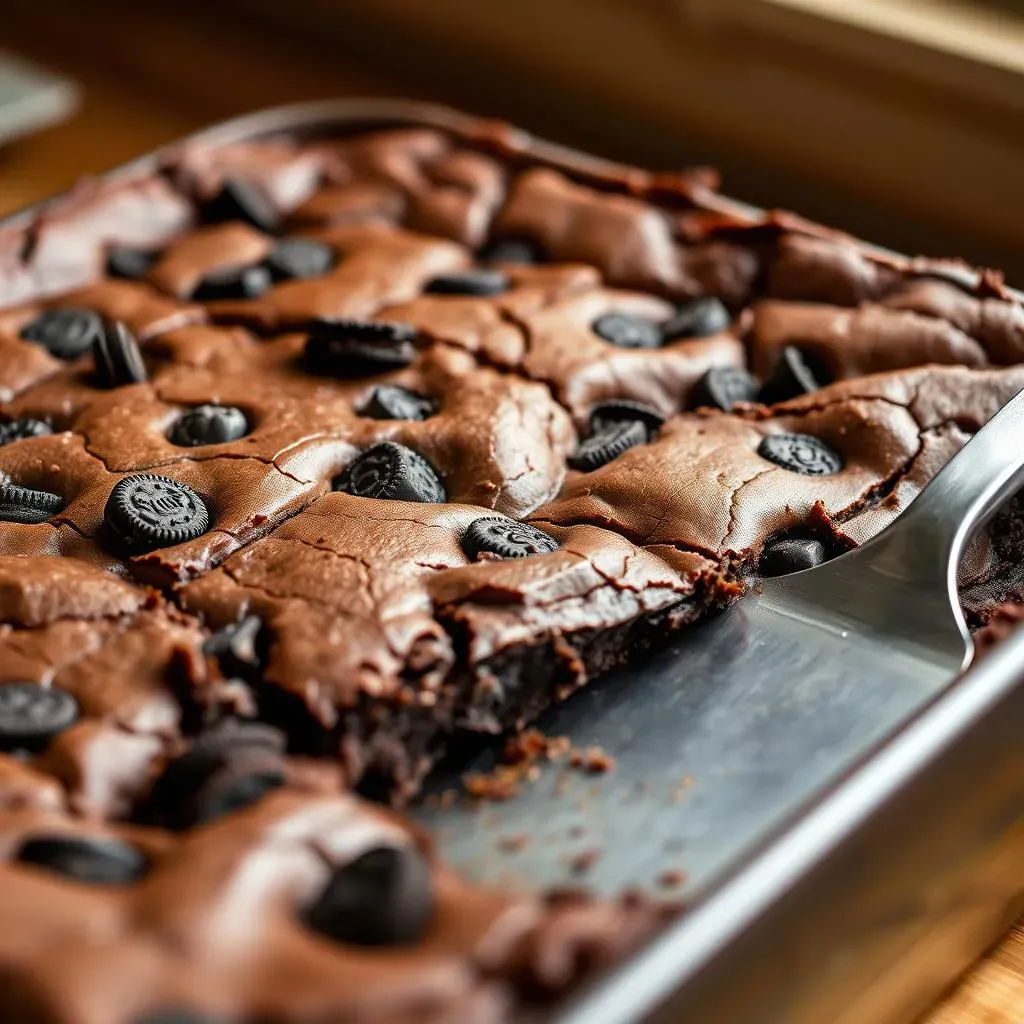
Once your batter is nice and smooth, it’s time for the Oreo magic. Take those 18-20 Oreos and gently break them into smaller pieces. Don't crush them, we want some nice chunks. Then, just fold them into the batter. Be gentle here; we don't want to turn the batter into a gray mess. Just a few stirs to distribute the Oreos evenly. Now, pour the batter into your prepared pan. Spread it out so it's even. If you added any extra chocolate chips, now is a good time to sprinkle them on top. Ready for the oven!
Baking to Perfection
Now, pop that pan into the preheated oven and bake for about 25-30 minutes. Keep an eye on them, because every oven is different. You'll know they're done when the edges are set and a toothpick inserted into the center comes out with a few moist crumbs attached. Don't worry if the toothpick isn't completely clean, we want them nice and fudgy. If it comes out with wet batter, give it a few more minutes. Overbaking is the enemy of fudgy brownies, so keep checking them.
Once they're done, take the pan out of the oven and let them cool completely in the pan. This is the hardest part, I know, but it’s super important. If you try to cut them while they’re still warm, they’ll fall apart. Once they’re completely cool, lift them out of the pan using the foil or parchment paper. Now, grab a big knife and cut into squares. A plastic knife works best, it won't stick as much. And there you have it – perfect brownies and oreos recipe, ready to be devoured.
Step | Action | Notes |
|---|---|---|
1 | Preheat oven | 350°F (175°C) |
2 | Prepare pan | Line with foil or parchment |
3 | Mix batter | Combine brownie mix, eggs, oil, and water |
4 | Add Oreos | Gently fold into the batter |
5 | Bake | 25-30 minutes |
6 | Cool | Completely in the pan |
Tips and Tricks for the Best Brownies and Oreos Recipe
Tips and Tricks for the Best Brownies and Oreos Recipe
The Fudgy Factor
Okay, let's talk about getting that perfect fudgy texture. It's all about not overbaking. Seriously, that’s the golden rule. Start checking your brownies around the 25-minute mark. You want a toothpick inserted into the center to come out with a few moist crumbs, not completely clean. If it’s clean, you’ve gone too far and your brownies will be more cakey than fudgy. It's a fine line, but with a little practice, you'll nail it. And remember, they continue to bake a little as they cool, so don't wait until they're completely set in the oven. Pull them out a little early for maximum fudginess. Trust me on this one, I've made enough batches to know the signs.
Another trick is to use slightly less oil than what the box calls for. This will make your brownies even denser and more fudgy. Just reduce the oil by a tablespoon or two. It makes a difference. Also, make sure your eggs are at room temperature. This helps them incorporate into the batter more evenly, which results in a smoother texture. It's the little details that make a big difference. And if you're feeling extra fancy, add a tablespoon of cornstarch to the batter. It helps create that chewy, fudgy texture that we all love. It's like a secret weapon for brownie perfection.
Oreo Placement and Prep
Now, let’s talk about those Oreos. Don't just dump them into the batter and hope for the best. Gently break them into smaller pieces, but not too small, we want to see those beautiful Oreo chunks in the final product. Then, evenly distribute them throughout the batter. This ensures that every bite has the perfect mix of brownie and Oreo. I like to press some of the Oreo pieces into the top of the batter before baking. This way, they get a little crispy on the top, adding a nice textural contrast. And if you’re using Double Stuf Oreos, be aware that they might make the brownies a little more moist, so you might need to bake them a couple of minutes longer.
Also, resist the temptation to add too many Oreos. Yes, we all love Oreos, but too many can make the brownies a little dense and difficult to bake evenly. About 18-20 Oreos is the sweet spot for a 9x13 inch pan. And here's a fun tip: try using different flavors of Oreos to match the occasion. Mint Oreos for St. Patrick's Day, Golden Oreos for a vanilla twist, the possibilities are endless. The key to the perfect Oreo placement is to think like an artist. You want each piece to be a little bit different, so you have a nice variety of textures and flavors in every bite. It's all about the details.
Tip | Benefit |
|---|---|
Don't overbake | Ensures fudgy texture |
Use slightly less oil | Makes brownies denser |
Room temp eggs | Smoother batter |
Cornstarch | Chewier texture |
Evenly distribute Oreos | Perfect mix in every bite |
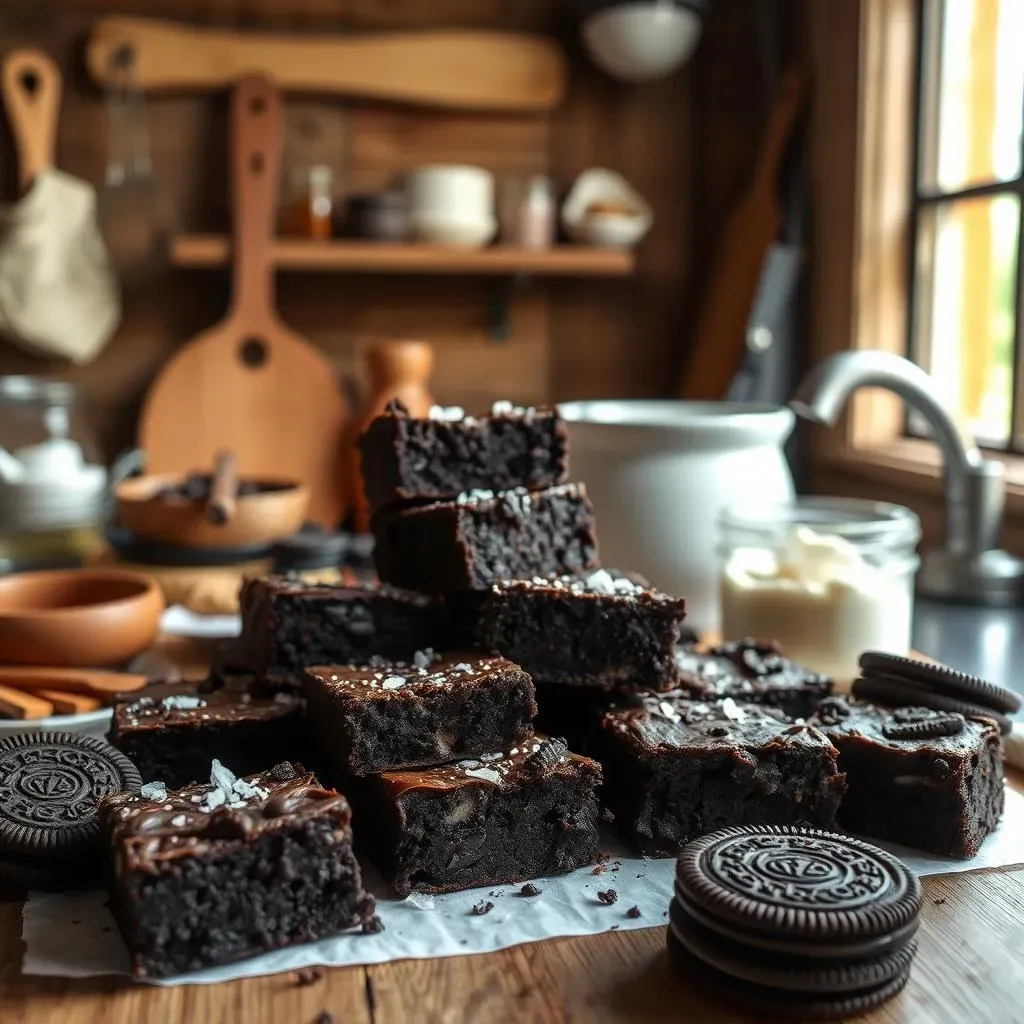
Cutting and Serving
Okay, so your brownies are out of the oven and cooled. Now comes the cutting part. This is where things can go sideways if you're not careful. Use a plastic knife, it's less likely to stick than a metal one. And wipe the knife clean after each cut. This will give you nice, clean squares. Also, resist the urge to cut them while they’re still warm. They’ll be too gooey and will fall apart. Let them cool completely in the pan, then lift them out using the foil or parchment paper. It’s so much easier to cut when they are completely cool.
And if you want to get fancy, you can warm up the knife under hot water before each cut. This will help it slice through the brownies more smoothly. And for serving, you can go classic with a scoop of vanilla ice cream, or get creative with some chocolate sauce and whipped cream. Or, if you’re feeling decadent, add a drizzle of caramel sauce. These brownies are perfect on their own, but they are also the perfect canvas for all kinds of delicious toppings. And, if you're like me, you might just grab one straight from the pan. No judgment here, they are that good. Remember, the goal is to enjoy every single bite.
"The secret ingredient is always love (and maybe a little extra chocolate)."