Table of Contents
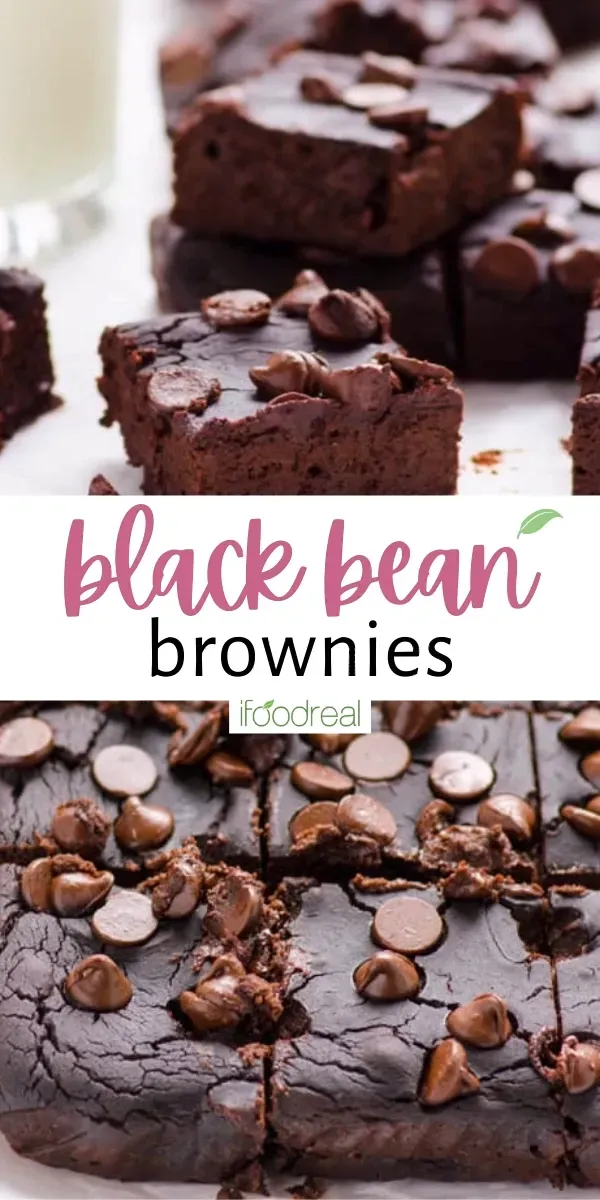
Ever crave a warm, fudgy brownie but feel guilty about all the flour and sugar? Maybe you've heard whispers about using black beans in baking and thought, "No way, that sounds... weird." Trust us, we get it. The idea of sneaking legumes into dessert seems counterintuitive, bordering on dessert blasphemy. But what if we told you there's a ridiculously easy way to make incredibly moist, rich brownies that happen to be packed with fiber and protein, and all you need is a can of black beans and your trusty blender? That's right, mastering black bean brownies blender style is not only possible, it's surprisingly simple and yields a result that might just make you a believer. This article cuts straight to the chase, showing you exactly why using a blender is the game-changer, the few ingredients you need, the straightforward steps to get batter into the pan, and tips to ensure your black bean brownies are the fudgiest, most delicious batch yet. Forget complicated steps and multiple bowls; get ready to blend your way to brownie bliss.
Why Make Black Bean Brownies in a Blender?
Why Make Black Bean Brownies in a Blender?
So, you're probably wondering, "Why Make Black Bean Brownies in a Blender?" It sounds a bit... unconventional, right? Forget pulling out multiple bowls, sifting flour (which you won't even need!), and dealing with messy cleanup. The magic of using a blender for black bean brownies is pure, unadulterated convenience. You literally toss all the ingredients into one container, hit a button, and watch it transform into a smooth, glossy batter. This method pulverizes the black beans so thoroughly that you won't get any gritty texture or bean bits in your final brownie. It creates an incredibly uniform mixture, which is key to that dense, fudgy texture everyone wants in a brownie. Plus, it saves you serious time and effort compared to traditional baking methods.
Gathering Ingredients for Your Black Bean Brownies

Gathering Ingredients for Your Black Bean Brownies
Starting with the Essentials
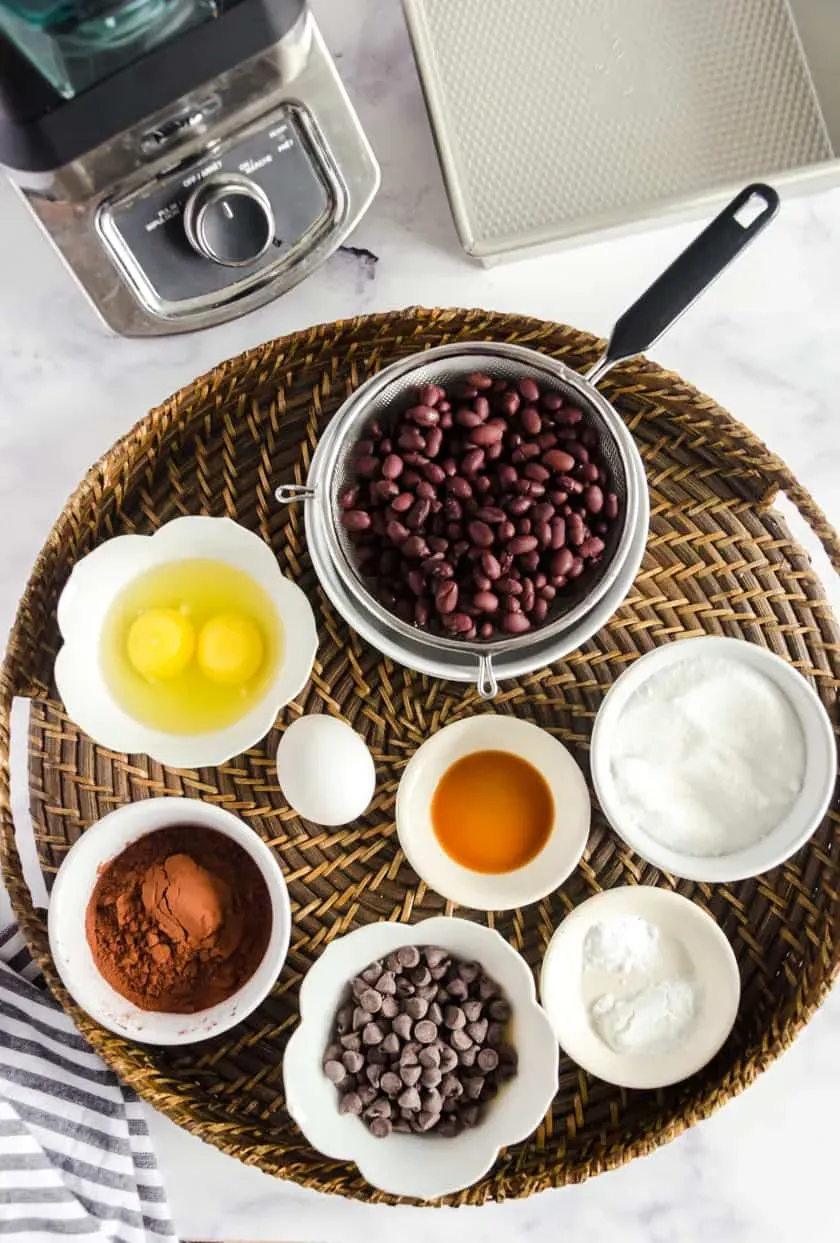
Alright, so you're sold on the blender idea. Now, what exactly do you need to throw in there? The foundation of these black bean brownies is, predictably, a can of black beans. Make sure they're rinsed really well. You don't want any of that canning liquid funk messing with your dessert vibe. Beyond the beans, you'll need the usual suspects for brownies: cocoa powder for that deep chocolate flavor, some form of sugar (granulated, brown, or a mix works), eggs to bind everything together, and a fat source like melted butter or oil. This core group creates the dense, fudgy base we're aiming for.
Boosting Flavor and Texture
Once you have the basics covered, it's time to add the flavor agents that make these taste like actual brownies, not just blended beans. Vanilla extract is non-negotiable; it enhances the chocolate and mellows any potential bean-y undertones. A pinch of salt is crucial for balancing the sweetness. Baking powder gives them just enough lift so they aren't hockey pucks, but still keeps them dense. And of course, chocolate chips are a must for pockets of melted goodness. You can use semi-sweet, dark, or even white chocolate chips depending on your preference.
Here's a quick rundown of the usual suspects:
- One standard can (15 oz) black beans, rinsed and drained
- Eggs
- Granulated or brown sugar
- Unsweetened cocoa powder
- Melted butter or neutral oil (like vegetable or canola)
- Vanilla extract
- Baking powder
- Salt
- Chocolate chips (optional, but highly recommended)
Whipping Up Black Bean Brownies: The Blender Method
Whipping Up Black Bean Brownies: The Blender Method
Alright, the ingredients are lined up. Now for the fun part: making those black bean brownies blender magic happen. This is where the simplicity truly shines. Grab your blender – a high-powered one is great, but honestly, most standard blenders will get the job done. Start by adding the wet ingredients first; this helps everything blend smoothly. Think melted butter or oil, eggs, and vanilla extract. Then pile in the rinsed black beans, followed by the dry stuff like cocoa powder, sugar, baking powder, and salt. Secure the lid tightly. Hit the blend button and let it run. You're aiming for a completely smooth, thick batter. Scrape down the sides with a spatula if needed to make sure there are no sneaky bean chunks hiding out. It should look like regular, albeit slightly darker, brownie batter – no grainy texture allowed.
Here’s the quick blend sequence:
- Add wet ingredients (melted fat, eggs, vanilla) first.
- Toss in the rinsed black beans.
- Add all dry ingredients (cocoa, sugar, baking powder, salt).
- Blend until completely smooth, pausing to scrape sides.
- Stir in chocolate chips by hand *after* blending.
Tips for Your Best Black Bean Brownies Blender Batch
Tips for Your Best Black Bean Brownies Blender Batch
Nail the Blend: Smooth Operator Status
you've got everything in the blender, ready to go. This is where the magic happens, or where it goes slightly wrong if you rush it. The number one tip for amazing black bean brownies blender success is to blend until that batter is absolutely, unequivocally smooth. We're talking no speckles, no tiny bean pieces, nothing. It should look like regular thick brownie batter. If your blender isn't super powerful, you might need to stop, scrape down the sides a couple of times, and blend again. Don't be lazy here. A grainy texture is the quickest way to give away your secret ingredient, and nobody wants that. Blend it until it's glossy and uniform.
- Rinse beans thoroughly – multiple times is best.
- Add wet ingredients first to help the blend.
- Scrape down blender sides as needed.
- Blend until *zero* bean texture remains.
- Don't overfill the blender; work in batches if necessary.
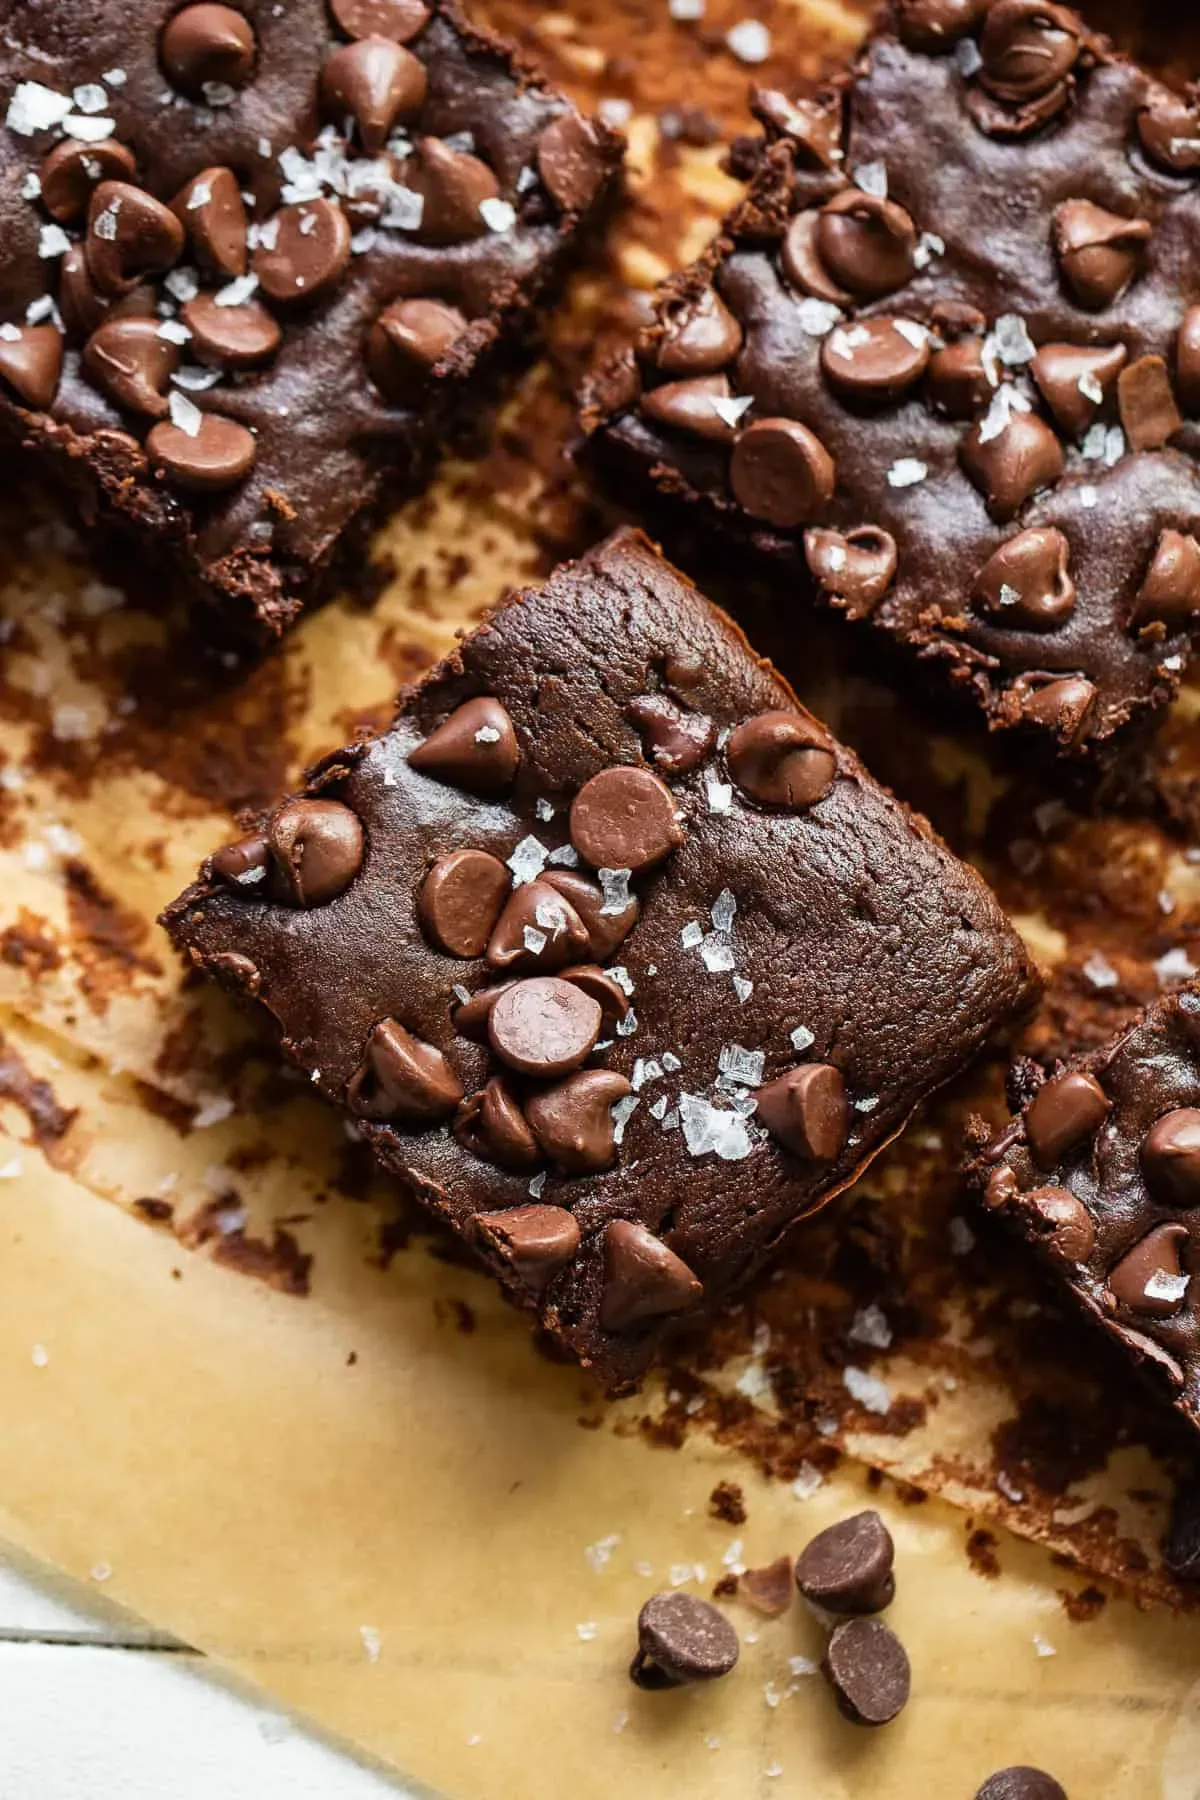
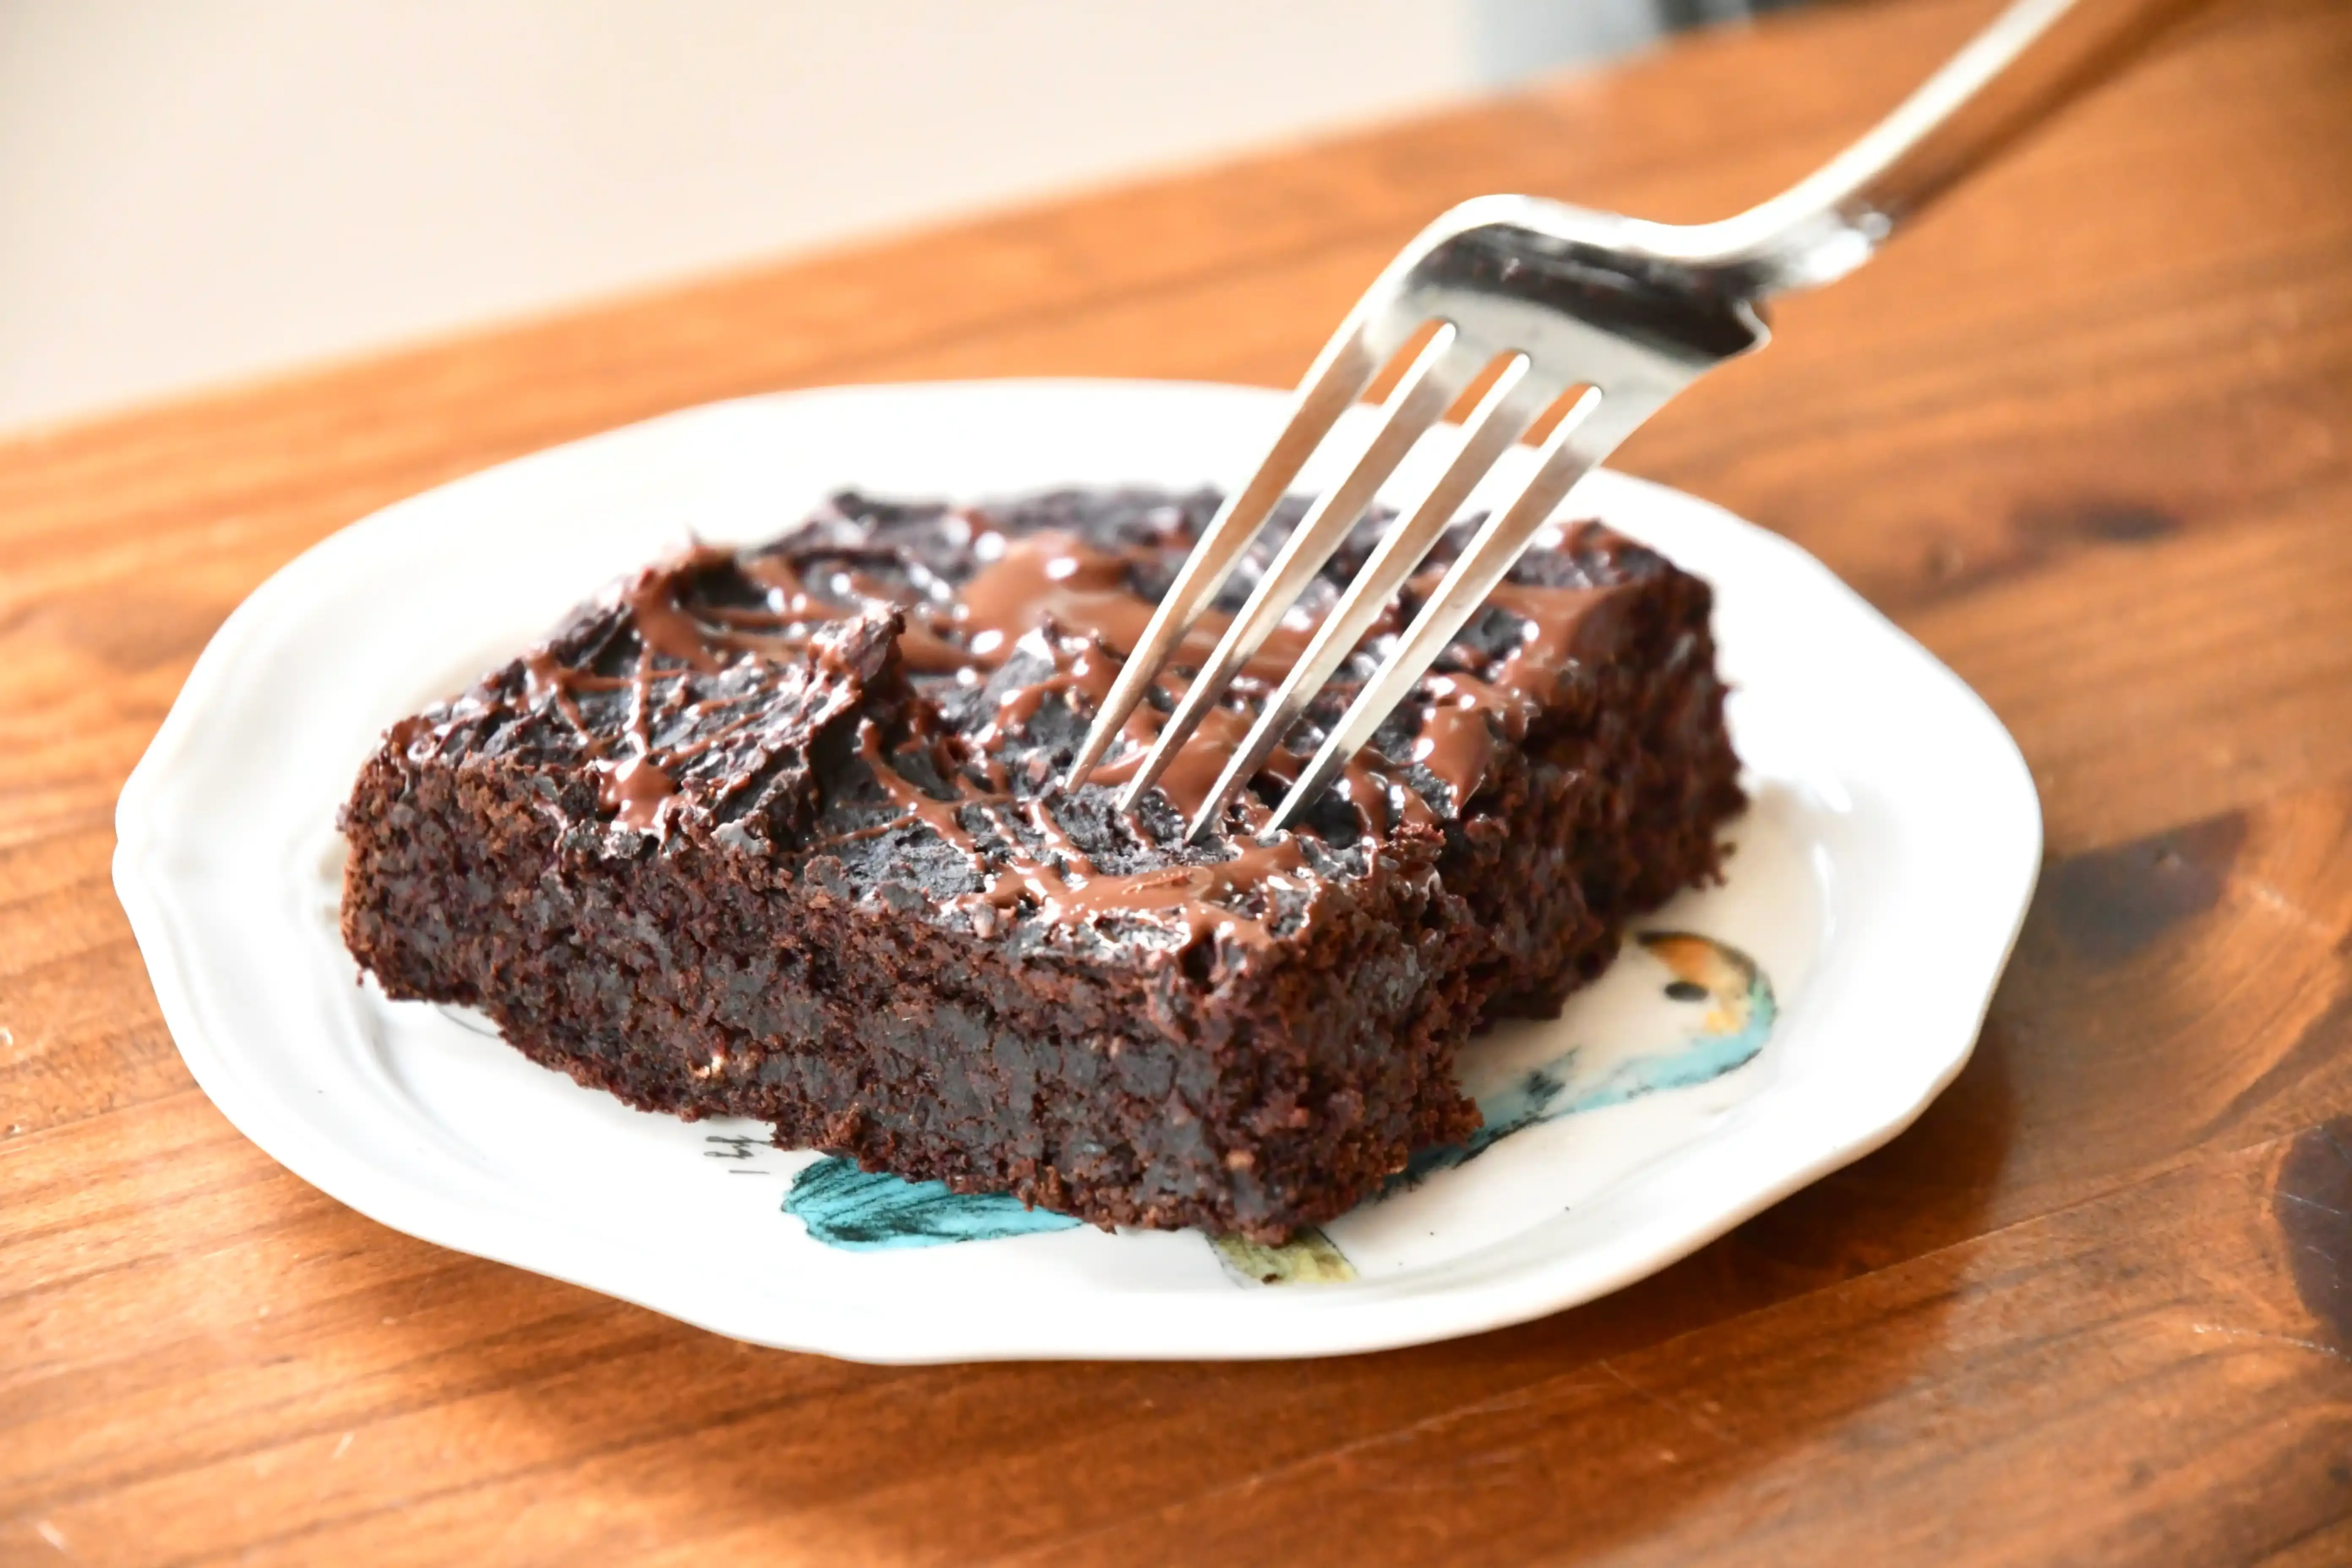
Pan Prep and Doneness: Avoiding Sticky Situations
You've got perfect, smooth batter. Now, getting it into the pan and baked correctly is crucial for those fudgy edges and a soft center. Always, and we mean *always*, line your baking pan with parchment paper, leaving some overhang on the sides. This makes lifting the cooled brownies out a breeze. Spraying the paper and the exposed pan sides with cooking spray is cheap insurance against sticking. As for baking, these black bean brownies blender recipes often bake faster than traditional ones. Start checking around 20-25 minutes. A toothpick inserted into the center should come out with moist crumbs attached, not completely clean (that means overdone!) and definitely not wet batter. Overbaking is the enemy of fudgy.
Pan Prep Must-Dos | Doneness Check |
|---|---|
Line with parchment paper | Start checking early (20-25 mins) |
Leave parchment overhang | Toothpick test: moist crumbs, not clean |
Spray paper and exposed pan | Edges should look set, center slightly soft |
Storing and Enjoying Blender Black Bean Brownies
Storing and Enjoying Blender Black Bean Brownies
Cooling Down Before Packing Up
You've successfully blended, baked, and now you're staring at a pan of warm, fudgy black bean brownies. The hardest part isn't the baking; it's waiting for them to cool. Seriously, resist the urge to hack into them immediately. Letting them cool completely in the pan on a wire rack allows them to set properly, developing that perfect dense texture. Cutting into hot brownies usually results in a gooey, crumbly mess, and while still edible, it's not the peak experience. Once they're cool to the touch, lift the entire slab out using the parchment paper overhang. You can then slice them into squares. For short-term storage, an airtight container at room temperature is fine for a couple of days. Just keep them out of direct sunlight or warm spots, unless you enjoy slightly melty, stuck-together squares.
- Store at room temperature in an airtight container for up to 2-3 days.
- Refrigerate in an airtight container for up to a week.
- Freeze individual brownies wrapped tightly in plastic wrap, then in a freezer bag or container, for up to 3 months.
- Always cool completely before storing to prevent condensation.
Refrigerating and Freezing for Later
If you've somehow managed not to devour the entire batch of your black bean brownies blender creation within 48 hours (impressive self-control, by the way), refrigeration is your friend. Pop the sliced brownies into an airtight container and stash them in the fridge. They'll keep well for about a week. Chilling them can actually enhance the fudgy texture for some people, making them even denser. For longer-term preservation, freezing is the way to go. Wrap individual brownies tightly in plastic wrap, then place them in a freezer-safe bag or container. This double layer of protection helps prevent freezer burn. They'll keep happily in the freezer for up to three months. Just pull one out and let it thaw at room temperature for a bit, or give it a quick zap in the microwave if you're impatient (we won't judge).
Wrapping Up Your Black Bean Brownie Adventure
So there you have it. The secret weapon for surprisingly good brownies isn't some exotic flour or fancy technique; it's a humble can of black beans and the convenience of a blender. We walked through why blending works, the basic stuff you need, the simple steps, and a few pointers to get them just right. If you were skeptical at first, join the club. But give the black bean brownies blender method a shot. They're not just "good for being black bean brownies"; they're just plain good brownies. Period. They might even make you look at that can of beans in your pantry a little differently next time.