
Table of Contents
Have you scrolled through Facebook lately and seen everyone raving about banana pudding brownies? These aren't your average brownies; they're a decadent fusion of rich, fudgy goodness and the creamy, comforting flavors of classic banana pudding. This recipe takes the internet by storm, combining two beloved desserts into one irresistible treat that's perfect for potlucks, parties, or simply satisfying your sweet tooth. We'll walk you through everything you need to know to create your own batch of banana pudding brownies that will be sure to impress your friends and family. Get ready to discover the secrets to moist, flavorful brownies, the perfect pudding swirl, and that signature vanilla wafer crunch that makes these banana pudding brownies facebook famous. From ingredient selection to baking tips, we've got you covered. Let's get baking!
Why Banana Pudding Brownies are Taking Over Facebook Feeds
Why Banana Pudding Brownies are Taking Over Facebook Feeds
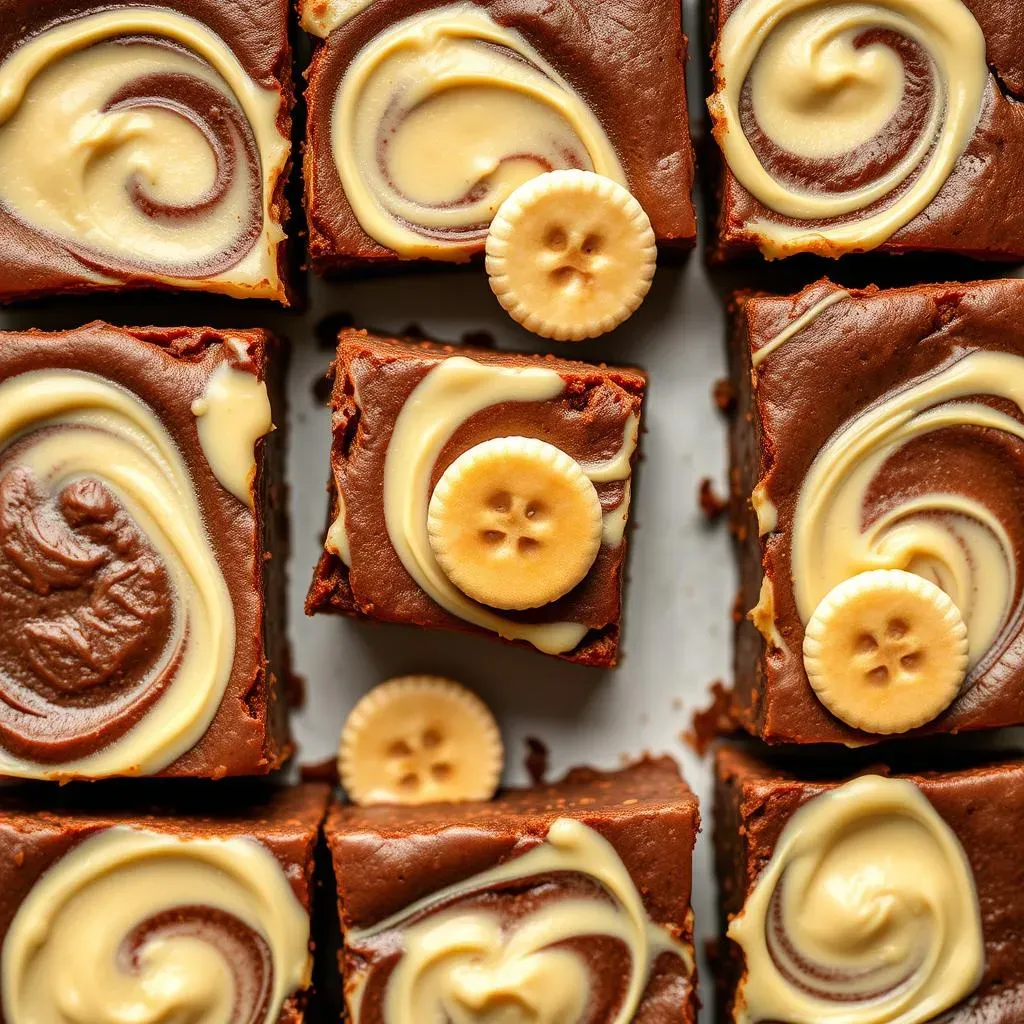
so picture this: you're scrolling through Facebook, right? Suddenly, BAM! A picture of these gooey, decadent banana pudding brownies pops up. And then another. And another! It's like they're everywhere! But why? Well, first off, let's be honest, anything with "brownies" in the name is already a winner. But these aren't just any brownies. They're a glorious combination of two comfort food classics: rich, fudgy brownies and creamy, dreamy banana pudding. It's like a dessert love story unfolding right before your eyes. Plus, that visual appeal, with the swirls of pudding and the strategically placed vanilla wafers? It's total Instagram bait. People see them, they want them, and they want to share them. The ease of sharing recipes on Facebook also helps fuel the fire. Someone makes them, posts a picture, and suddenly everyone in their friend group is clamoring for the recipe. It's a delicious domino effect!
The Secret to Perfect Banana Pudding Brownies: Ingredients and Prep
The Secret to Perfect Banana Pudding Brownies: Ingredients and Prep
The Brownie Base: Choosing Your Chocolate Champion
Alright, let's talk brownies. The foundation of our masterpiece! You've got options here. Boxed mix? Sure, go for it if you're short on time. But if you really want to knock those Facebook scrollers' socks off, homemade is the way to go. We're talking rich, fudgy, melt-in-your-mouth goodness. Think about the type of chocolate you want to use. Dark chocolate will give you a deeper, more intense flavor, while milk chocolate will be sweeter and more classic. Unsweetened cocoa powder is also your friend for controlling the sweetness and adding that signature brownie bitterness. Don't skimp on the butter! It's what makes those brownies super moist and decadent.
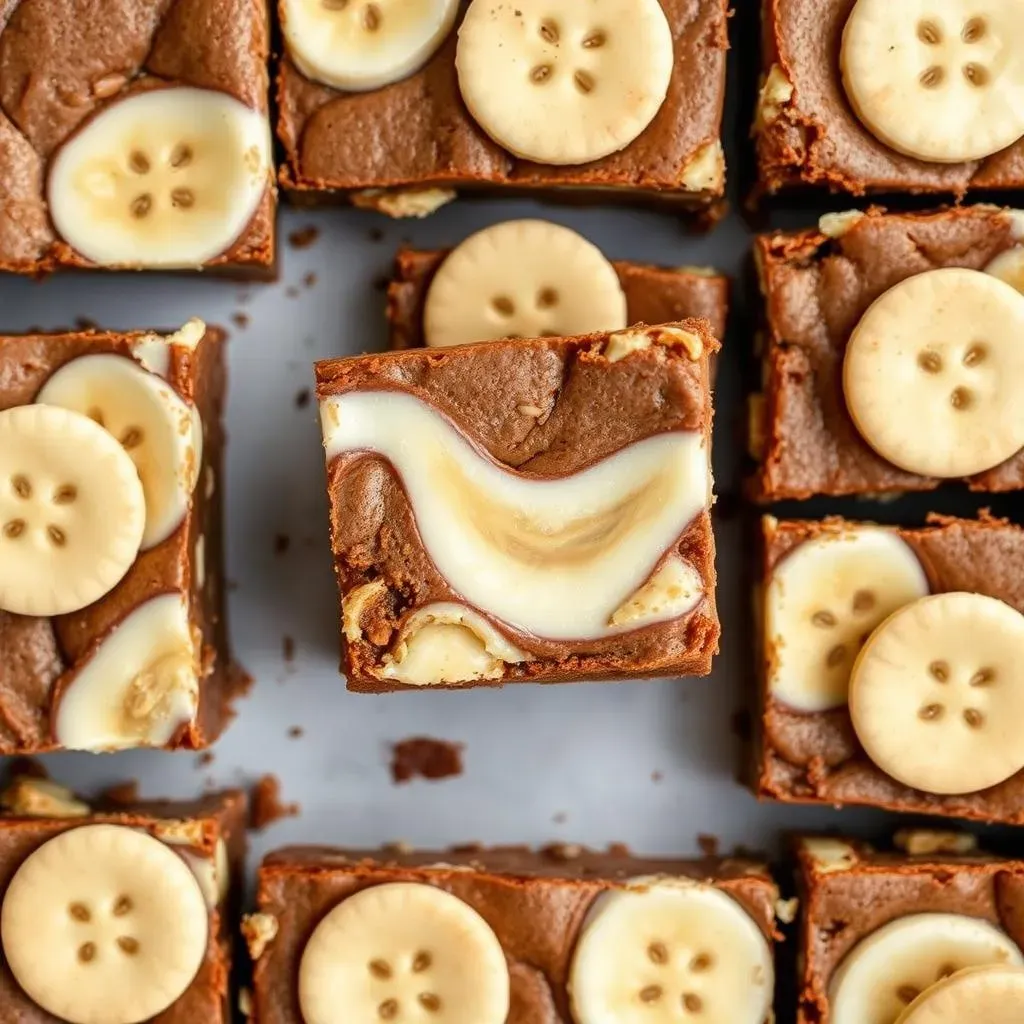
And the bananas? Oh, the bananas! This is where the "banana" in banana pudding brownies really shines. Overripe bananas are key. I'm talking spotty, almost-too-far-gone bananas. They're sweeter and have a stronger banana flavor, which is exactly what we want. Plus, they're easier to mash, which means they'll incorporate beautifully into the brownie batter. Think of them as the secret weapon for achieving that perfect banana-y goodness. Seriously, don't even think about using those slightly-yellow, "perfect" bananas. They just won't cut it.
Pudding Perfection: Achieving Creamy Dreaminess
Now, for the pudding! You can go the instant pudding route for convenience, and that's totally fine. But if you're feeling ambitious, homemade vanilla pudding is seriously next-level. It's richer, creamier, and has a more authentic vanilla flavor. Plus, you get to control the sweetness. Whether you're going instant or homemade, make sure you use whole milk. It'll give you that extra creaminess we're looking for. And don't be afraid to add a splash of vanilla extract to boost the flavor even more.
Vanilla wafers are non-negotiable. They're the iconic component that screams "banana pudding!" You can use the mini ones or the regular-sized ones, depending on your preference. Some people like to crush them up and mix them into the brownie batter, while others prefer to arrange them artfully on top of the finished brownies. There's no wrong way to do it! Just make sure you have them. They add that perfect textural contrast to the soft brownies and creamy pudding. It’s a symphony of textures and flavors that will make your taste buds sing.
Ingredient | Why It Matters |
|---|---|
Overripe Bananas | Intense banana flavor, moisture |
Good Quality Chocolate | Rich, decadent brownie flavor |
Whole Milk | Creamier pudding |
Vanilla Wafers | Authentic banana pudding element, texture |
Baking Your Banana Pudding Brownies: StepbyStep Instructions
Baking Your Banana Pudding Brownies: StepbyStep Instructions
Step 1: Brownie Batter Bonanza
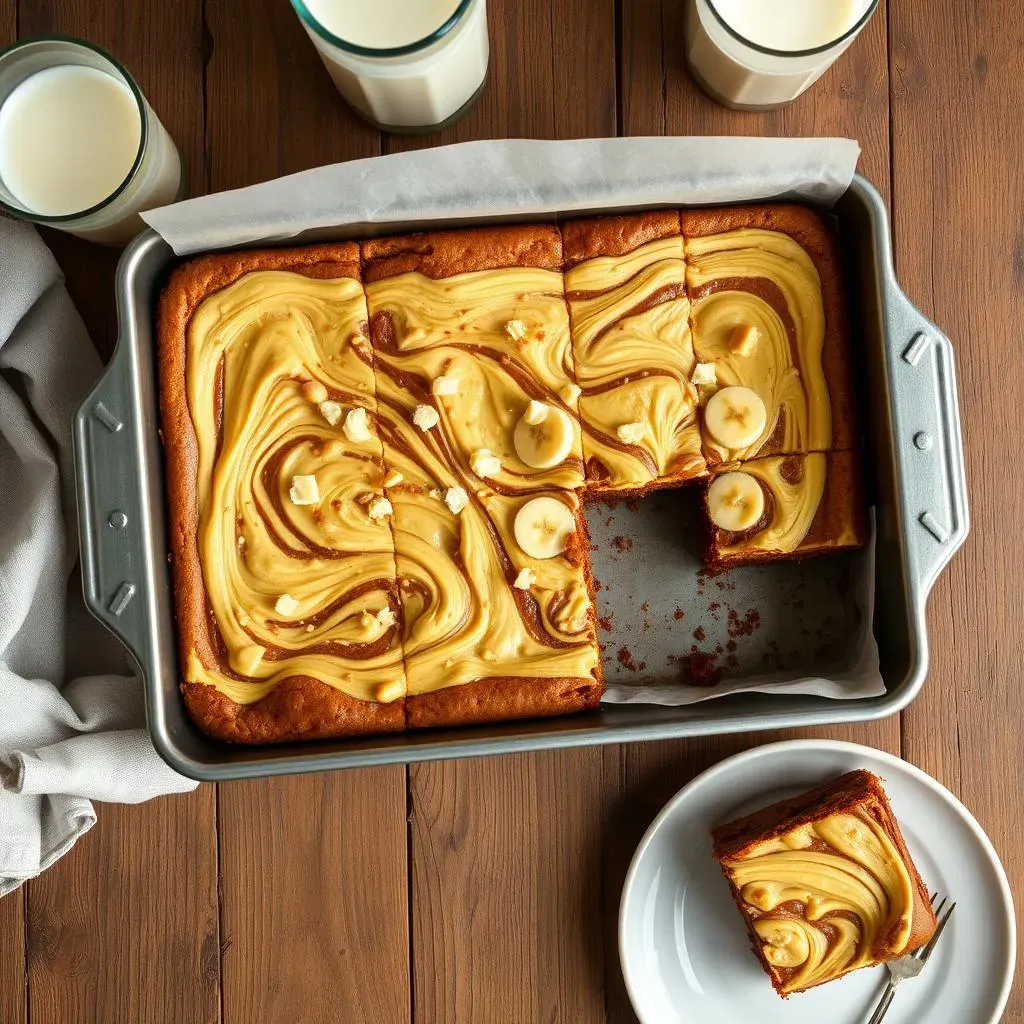
Alright, let's get this brownie party started! First, preheat your oven to 350°F (175°C). Grease and flour a 9x13 inch baking pan. This is crucial, trust me. Nobody wants stuck brownies. Now, if you're using a boxed mix, follow the instructions on the box. Easy peasy. If you're going the homemade route, melt your butter and chocolate together (or use cocoa powder). In a separate bowl, whisk together your eggs, sugar, and vanilla extract. Then, gently fold in the melted chocolate mixture and your mashed overripe bananas. Finally, add your dry ingredients (flour, baking powder, salt) and mix until just combined. Be careful not to overmix! Overmixing leads to tough brownies, and nobody wants that.
Pour half of the brownie batter into your prepared pan. Now, for the vanilla wafer layer! Arrange your vanilla wafers in a single layer over the brownie batter. You can be neat and organized, or you can just randomly plop them on there. It's up to you! Just make sure they're evenly distributed. Pour the remaining brownie batter over the vanilla wafers, spreading it out as evenly as possible. It's okay if some of the wafers peek through. That just adds to the rustic charm, right?
Step 2: Pudding Swirl Spectacle
Time for the pudding swirl! If you're using instant pudding, prepare it according to the package directions. If you're using homemade pudding, make sure it's nice and thick. Now, dollop spoonfuls of pudding over the brownie batter. Then, using a knife or a toothpick, gently swirl the pudding into the brownie batter. Don't overdo it! You want to create a nice marbled effect, not completely mix the pudding into the batter. The key is to create those beautiful, Facebook-worthy swirls that will make everyone drool.
Now, for a little extra flair, you can sprinkle some crushed vanilla wafers over the top of the pudding swirl. This adds a nice textural element and makes the brownies look even more irresistible. Pop the pan into the preheated oven and bake for 25-30 minutes, or until a toothpick inserted into the center comes out with fudgy crumbs. Keep an eye on them! Ovens vary, so you might need to adjust the baking time slightly.
Step | Description | Tip |
|---|---|---|
1 | Prepare Brownie Batter | Don't overmix! |
2 | Vanilla Wafer Layer | Evenly distribute wafers |
3 | Pudding Swirl | Gently swirl, don't overmix |
Step 3: Cool, Cut, and Conquer
Once the brownies are baked, remove them from the oven and let them cool completely in the pan before cutting. This is important! If you try to cut them while they're still warm, they'll be a gooey mess. Trust me, I've been there. Once they're cool, cut them into squares and prepare to be amazed. These banana pudding brownies are seriously addictive. The combination of the fudgy brownie, the creamy pudding, and the crunchy vanilla wafers is just heavenly. They're perfect for sharing (or not sharing, I won't judge). They’re a guaranteed crowd-pleaser, and you’ll be the star of any Facebook post you share them on.
You can store them in an airtight container at room temperature for a few days, or in the refrigerator for up to a week. But let's be real, they probably won't last that long. They're just too good! Enjoy your homemade banana pudding brownies, and get ready for the Facebook likes to roll in!
Tips & Tricks for Irresistible Banana Pudding Brownies (FacebookWorthy!)
Tips & Tricks for Irresistible Banana Pudding Brownies (FacebookWorthy!)
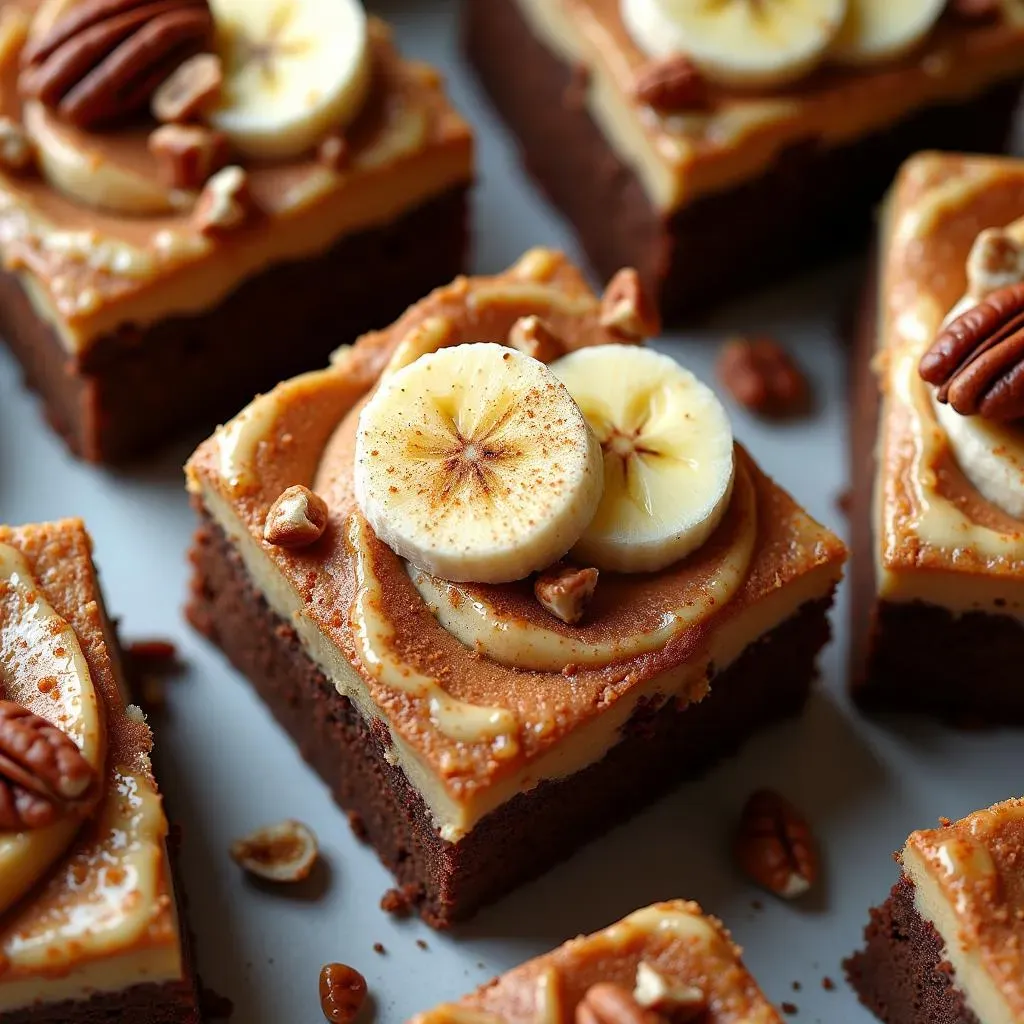
so you've got the basics down, but you want to take your banana pudding brownies from "meh" to "OMG!" Here are a few tips and tricks to really make them stand out. First, presentation is key, especially if you're planning on posting these bad boys on Facebook. Take the time to arrange the vanilla wafers artfully on top before baking. Consider creating a swirl pattern with the pudding that's visually appealing. A sprinkle of crushed vanilla wafers or even a dusting of cocoa powder can also elevate the look. Remember, we eat with our eyes first! Also, don't be afraid to experiment with different flavors. Add a dash of cinnamon to the brownie batter for a warm, comforting twist, or incorporate some chopped pecans or walnuts for added texture. You can even drizzle a little caramel sauce over the top for extra decadence. The possibilities are endless!
Want to make your brownies extra fudgy? Use melted butter instead of softened butter. The melted butter will create a denser, chewier texture. To prevent the pudding from sinking to the bottom of the brownies, try chilling the brownie batter for about 30 minutes before adding the pudding swirl. This will help the batter firm up slightly and prevent the pudding from seeping through. And finally, don't overbake the brownies! Slightly underbaked brownies are always better than overbaked brownies. They'll be fudgier and more moist. A toothpick inserted into the center should come out with moist crumbs, not clean. Trust your instincts!
Ever find yourself with rock-hard bananas and a craving for these brownies *now*? No problem! There are a couple of quick ways to ripen bananas in a pinch. You can poke holes in the bananas with a fork and microwave them for 30 seconds to a minute. Keep a close eye on them, because they can explode! Another method is to bake them in the oven at 300°F (150°C) for about 15-20 minutes. The skins will turn black, but the bananas inside will be perfectly ripe and ready to use. As for pudding consistency, if you find that your pudding is too runny, try adding a tablespoon of cornstarch to the mixture. This will help thicken it up without affecting the flavor. On the other hand, if your pudding is too thick, add a splash of milk until it reaches your desired consistency.
To make the brownies even more Facebook-worthy, consider adding a fun topping after they've cooled. A drizzle of melted white chocolate, a sprinkle of colorful sprinkles, or even a few fresh banana slices can take them to the next level. You can also cut the brownies into fun shapes using cookie cutters. Think hearts for Valentine's Day, stars for the Fourth of July, or pumpkins for Halloween. Get creative and have fun with it! And most importantly, don't forget to take a good picture before you devour them all. Natural lighting is your friend! Find a well-lit spot and snap a few photos from different angles. Then, share your masterpiece with the world and watch the likes roll in!
Tip | Description |
|---|---|
Presentation | Arrange wafers artfully, swirl pudding |
Flavor Boost | Add cinnamon, nuts, caramel |
Fudgy Factor | Use melted butter |
Quick Ripening | Microwave or bake bananas |
Your Banana Pudding Brownies Await!
So, there you have it – the ultimate guide to making banana pudding brownies that are sure to be a Facebook sensation! With a little patience and these simple steps, you can whip up a batch of these decadent treats that will have everyone begging for more. Don't be afraid to experiment with variations, like adding chocolate chips or a sprinkle of cinnamon. Most importantly, have fun and enjoy the process. Now go forth, bake, and share your delicious creations with the world (and maybe snap a photo for Facebook while you're at it!).