Table of Contents
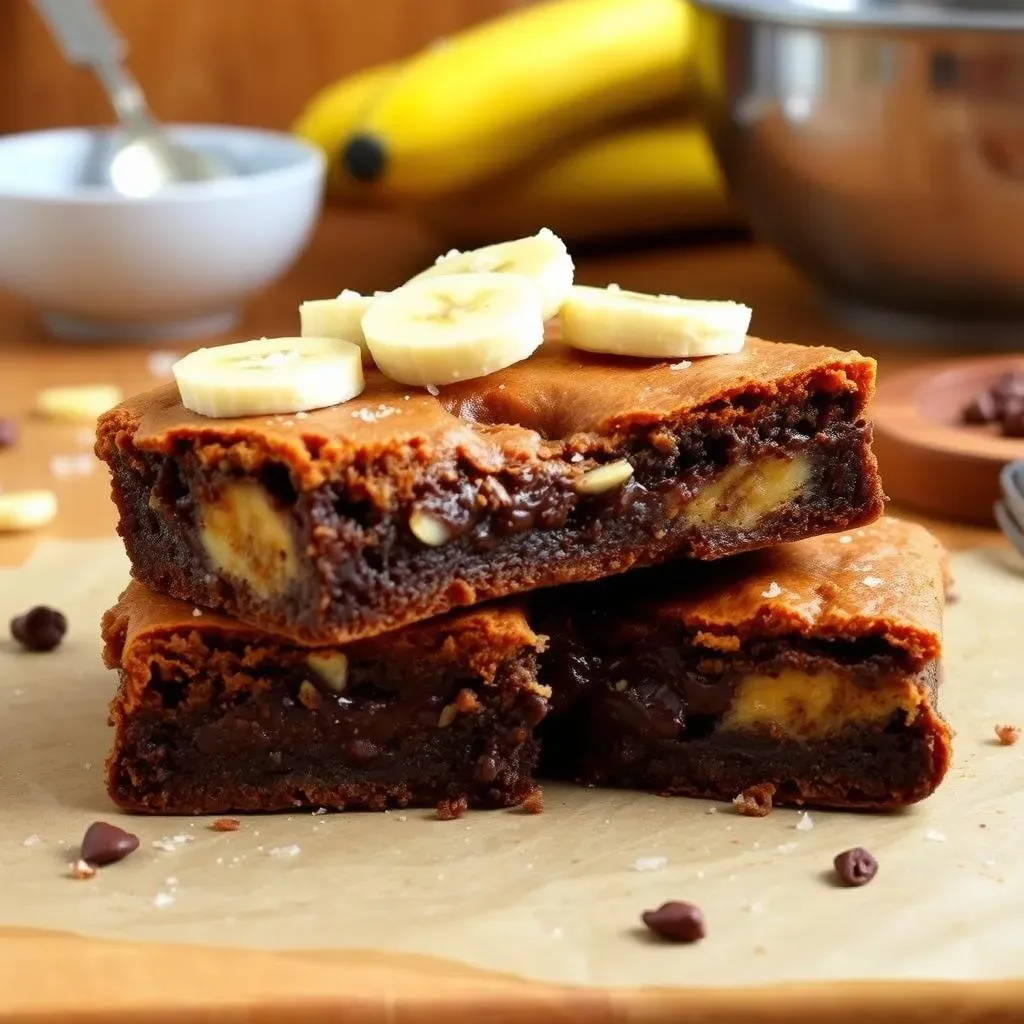
Ever find yourself staring at a bunch of overripe bananas, wondering what to bake? I have, and that’s when the magic of banana brownie bars happened. Forget choosing between banana bread and brownies, this recipe smashes them together for a treat that’s both comforting and decadent. We're talking about fudgy, chocolatey goodness with a hint of banana sweetness that will have everyone begging for more. This isn't just another recipe; it's a simple way to turn those sad, spotty bananas into something truly special. In this article, I'm going to walk you through how to make these amazing banana brownie bars recipe, from gathering your ingredients to adding your own creative twists. We'll cover the step-by-step process, and I'll even share some of my favorite ways to customize this recipe. So, grab your apron, and let's get baking!
Gathering Your Ingredients for Banana Brownie Bars
Gathering Your Ingredients for Banana Brownie Bars
The Banana Basics
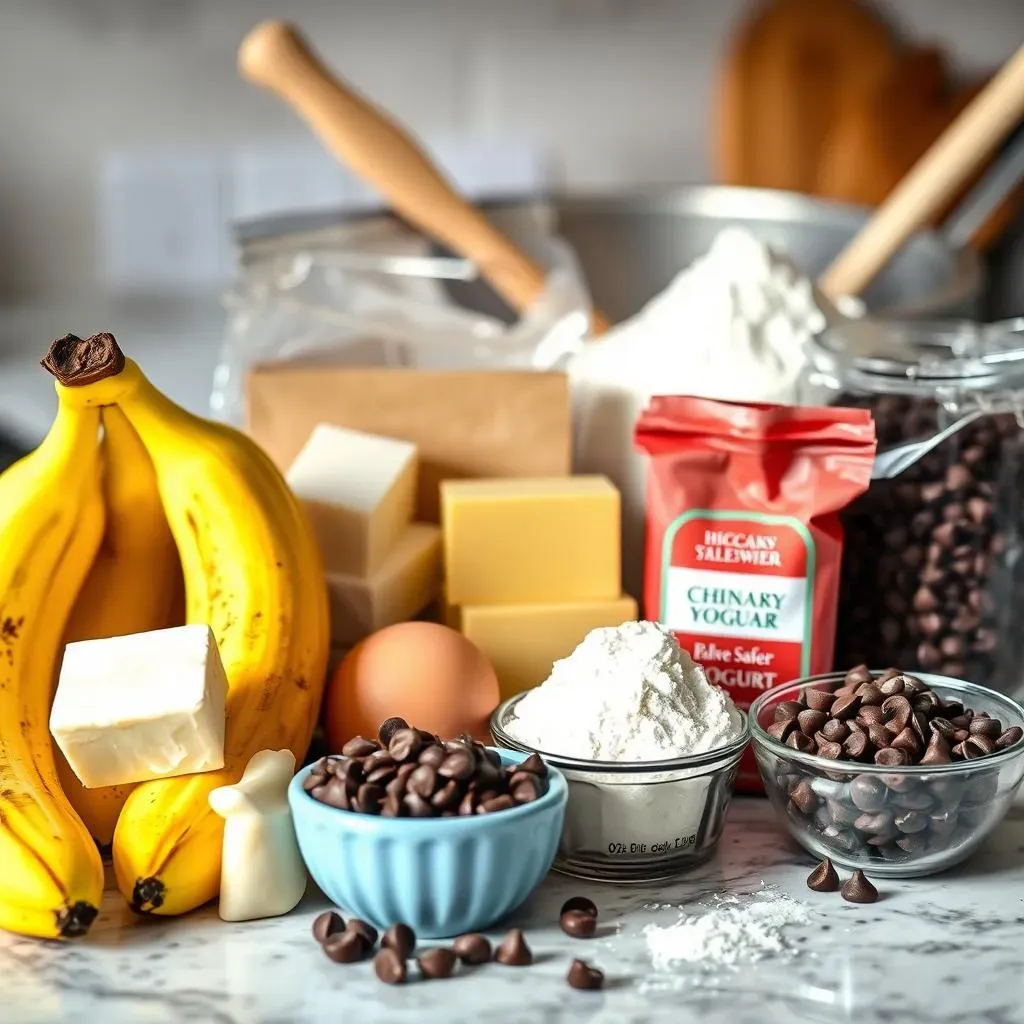
let's talk bananas. Not just any bananas, we need the ones that are practically begging to be baked – you know, the super ripe ones with lots of brown spots. These guys are packed with flavor and moisture, which is exactly what we need for our banana brownie bars. If they're still a bit green, hide them in a paper bag for a day or two, and they'll be perfect. Think of it like a banana spa day, they're just getting ready to shine in our recipe. We are going for a soft, sweet, and slightly tangy base, so don't be shy with those overripe bananas!
Beyond the bananas, we're going to need some kitchen staples. We're talking about butter, sugar, eggs, and flour, the usual suspects. But, the secret is in the details. For the best texture, I like to use a mix of granulated and brown sugar, it makes the bars extra chewy. And don't skimp on the good quality butter, it makes a big difference in the richness. Also, it’s crucial to have plain Greek yogurt or sour cream on hand, this is going to help keep everything moist and tender.
The Chocolate Factor
Now, the chocolate part is where things get serious. You have choices, my friend, and they are all delicious. You can use unsweetened cocoa powder for a deep, dark chocolate flavour. Or, if you are like me, you can add some melted semi-sweet chocolate to the batter for a richer flavor and extra fudginess. Chocolate chips are not mandatory, but they will definitely take your banana brownie bars to the next level. I like to use a mix of dark and milk chocolate chips for a balanced sweetness. The key is to choose a chocolate that makes you happy, because you are going to be enjoying it, so don’t hesitate to be a bit adventurous!
Finally, let’s not forget the supporting cast. A dash of vanilla extract will enhance all the flavors, and a pinch of salt will balance the sweetness. Baking powder helps the bars rise just a bit, giving them a perfect texture. I also like to add a touch of cinnamon, because banana and cinnamon are a match made in heaven. The overall idea is to make sure you have everything ready before you start baking, because once you start, it's going to be a beautiful, delicious adventure. So, check your pantry, make your shopping list, and let’s get cooking!
Ingredient | Amount | Notes |
|---|---|---|
Overripe Bananas | 3 medium | The spottier, the better! |
Butter | 1/2 cup | Softened, unsalted |
Granulated Sugar | 1 1/2 cups | For sweetness |
Brown Sugar | 1/2 cup | For a chewy texture |
Eggs | 2 large | Room temperature |
Greek Yogurt | 1 cup | Or sour cream |
All-Purpose Flour | 1 3/4 cups | For structure |
Cocoa Powder | 1/2 cup | Unsweetened |
Chocolate Chips | 1 cup | Optional, your choice! |
Vanilla Extract | 1 tsp | For flavor |
Baking Powder | 1/2 tsp | For lift |
Salt | 1/4 tsp | To balance flavors |
StepbyStep Guide to Making Banana Brownie Bars
StepbyStep Guide to Making Banana Brownie Bars
Getting Started: Mixing the Wet Ingredients
Alright, let's get our hands dirty! First things first, we need to cream together the softened butter and both sugars in a large bowl. You can use a hand mixer or a stand mixer, or even just a good old wooden spoon if you're feeling strong. Keep mixing until it's light and fluffy, like a cloud of sugary goodness. This step is crucial, because it will make the bars nice and tender. Next, beat in the eggs one at a time, making sure each one is fully incorporated before adding the next. Then, stir in the mashed ripe bananas and Greek yogurt or sour cream. It might look a little lumpy, but don’t worry, it will all come together in the end.
Now, add in the vanilla extract and give it another good mix. At this point, your kitchen should be smelling pretty amazing. If you're using melted chocolate, this is the time to pour it in and mix until everything is well combined. The batter should now be smooth, creamy, and utterly irresistible. I know, it's tempting to taste it now, but hold your horses, we're not done yet!
Combining Dry and Wet Ingredients
In a separate bowl, whisk together the flour, cocoa powder, baking powder, and salt. If you're adding cinnamon, throw that in too! This is your dry mixture, and we need to add it to the wet ingredients gradually. Add the dry mixture to the wet mixture in batches, mixing until just combined. Do not overmix, it's important to keep the bars tender. If you're adding chocolate chips, fold them in gently now. I like to use a spatula for this step, to make sure everything is mixed evenly without overworking the batter.
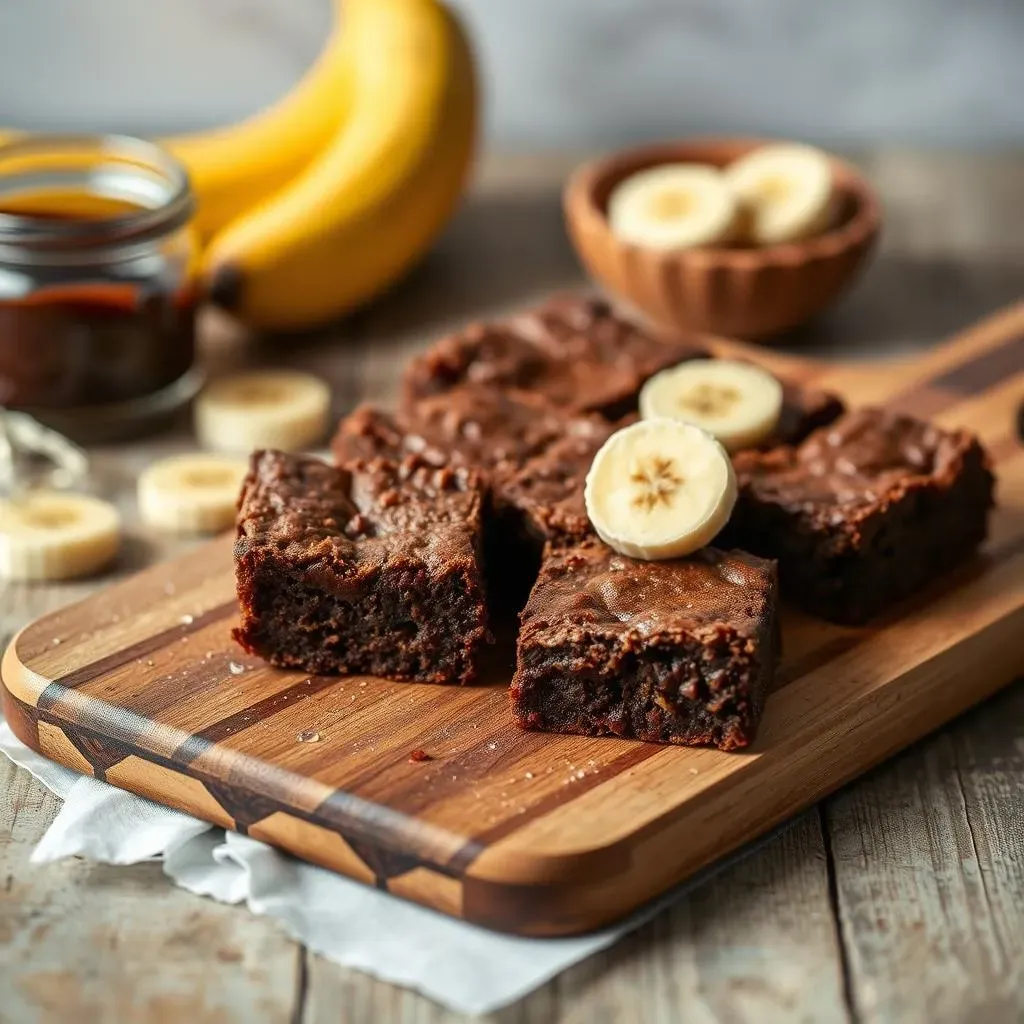
Pour the batter into a greased and lined baking pan. I prefer using parchment paper, it makes it super easy to lift the bars out once they're baked. Spread the batter evenly, and now, it's time to bake! Pop the pan into a preheated oven and let the magic happen. The bars are ready when a toothpick inserted into the center comes out with just a few moist crumbs attached. Let the bars cool in the pan before slicing them into squares. If you can wait that long, that is. I know it’s hard!
Step | Action | Notes |
|---|---|---|
1 | Cream butter and sugars | Until light and fluffy |
2 | Beat in eggs, one at a time | Ensure each is fully incorporated |
3 | Stir in mashed bananas and yogurt | Mix well |
4 | Add vanilla extract | Mix again |
5 | Combine dry ingredients in separate bowl | Whisk together |
6 | Gradually add dry to wet | Mix until just combined |
7 | Fold in chocolate chips (optional) | Gently |
8 | Pour into prepared pan | Spread evenly |
9 | Bake | Until a toothpick comes out with moist crumbs |
10 | Cool in pan | Before slicing |
Creative Twists on Your Banana Brownie Bars Recipe

Creative Twists on Your Banana Brownie Bars Recipe
Nutty Delights and Chocolate Swirls
so you've mastered the basic banana brownie bars recipe, that's awesome! But, what if I told you that you could make them even more amazing with a few simple tweaks? Let's start with nuts. Adding chopped walnuts or pecans not only gives the bars a satisfying crunch, but it also adds a layer of nutty flavor that complements the banana and chocolate perfectly. I usually toast the nuts before adding them, to bring out their flavor even more. And if you're not a fan of nuts, don't worry, we can skip them! Another great idea is to create a chocolate swirl. Melt some extra chocolate and drizzle it over the batter before baking. Then use a knife to swirl it in. This not only looks impressive, but it also adds pockets of intense chocolate flavor in every bite.
For a truly indulgent experience, consider adding some caramel. You can either drizzle caramel sauce over the baked bars or add a layer of caramel in the middle of the batter before baking, or even mix caramel bits into the batter if you have those. It will make the bars extra gooey and delicious. Don't be shy to experiment with different types of chocolate as well. Try using white chocolate chips, or chunks of different kinds of chocolate bars, or even add some espresso powder to the batter to enhance the chocolate flavor. The possibilities are truly endless, so don't hesitate to let your creativity flow and make this recipe your own.
Frosting Frenzy and Flavor Boosts
Now, let's talk about frosting. While these bars are absolutely delicious on their own, adding a frosting can take them to a whole new level. A simple chocolate ganache is always a good idea, or you can use a cream cheese frosting for a tangy twist. My personal favorite is a brown butter glaze, it’s just butter, powdered sugar, and vanilla extract, but it adds a nutty sweetness that goes perfectly with the banana and chocolate. If you are feeling adventurous, try using a peanut butter frosting or even a marshmallow fluff frosting. Frosting is like the cherry on top of a cake, but in this case, it is the frosting on top of a banana brownie bar!
Let’s not forget about the flavor boosts. A dash of sea salt on top of the bars will enhance the sweetness and make the flavors pop. Spices like nutmeg or cardamom can add warmth and complexity. If you're a fan of coffee, add a teaspoon of instant coffee to the batter, this will deepen the chocolate flavor. You can even add some shredded coconut or dried fruit for texture and flavor. The best part of baking is that you can really make the recipe your own, so go wild and have fun with it! And remember, it's okay to make mistakes, that's how you learn and discover new things. So, don’t be afraid to try new combinations, because you might just stumble upon your next favorite banana brownie bar recipe.
Twist | Description | Why it Works |
|---|---|---|
Toasted Nuts | Chopped walnuts or pecans | Adds crunch and nutty flavor |
Chocolate Swirl | Melted chocolate drizzled and swirled | Creates pockets of intense chocolate |
Caramel | Drizzled sauce or caramel bits | Adds gooey sweetness |
Different Chocolates | White, dark, or espresso powder | Enhances and diversifies flavor |
Frosting | Chocolate ganache, cream cheese, or brown butter | Adds extra layer of flavor |
Sea Salt | Sprinkled on top | Enhances sweetness |
Spices | Nutmeg, cardamom | Adds warmth |
Coffee | Instant coffee in batter | Deepens chocolate flavor |
Coconut or Dried Fruit | Shredded coconut or dried fruit | Adds texture and flavor |
Storing and Enjoying Your Delicious Banana Brownie Bars
Storing and Enjoying Your Delicious Banana Brownie Bars
Keeping Them Fresh
Alright, so you've baked these incredible banana brownie bars, and now you're wondering how to keep them from disappearing immediately (or maybe just how to keep them fresh for later). The good news is, these bars are pretty forgiving. For short-term storage, say a couple of days, just keep them in an airtight container at room temperature. I like to use a glass container, because it keeps them from drying out and also looks nice. If you’re stacking them, put a piece of parchment paper between the layers, so they don’t stick together. And if you've added a frosting, you might want to keep them in the fridge, just to be safe.
Now, let's talk about longer storage. If you want to make these bars ahead of time, or if you just have too many (is that even possible?), you can totally freeze them. Cut them into squares, wrap each one tightly in plastic wrap, and then put them in a freezer bag. They’ll keep in the freezer for up to three months. When you're ready to eat them, just take them out and let them thaw at room temperature. You can even warm them up in the microwave for a few seconds to get that fresh-out-of-the-oven feel. Trust me, frozen banana brownie bars are a lifesaver when you need a quick dessert fix.
Serving Suggestions and Pairings
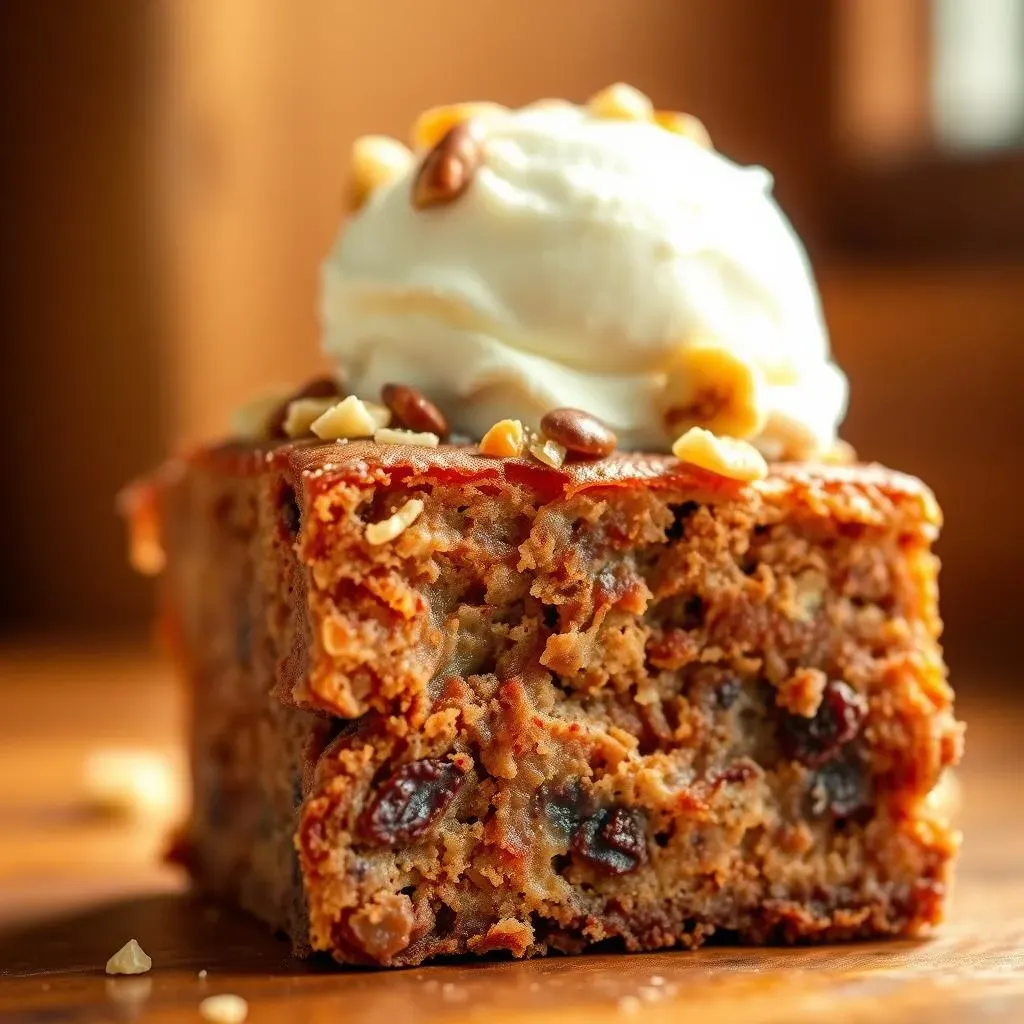
so you have your perfect banana brownie bars, now what? Well, you can just eat them as they are, of course, but there are so many ways to elevate the experience. A scoop of vanilla ice cream on top is always a winner, or you can drizzle some warm chocolate sauce over them. If you're feeling fancy, add a dollop of whipped cream and a sprinkle of chopped nuts. These bars are also great with a cup of coffee or tea, the bitterness of the coffee balances the sweetness of the bars perfectly. They also pair well with a glass of milk, for a classic combo.
For a more adventurous pairing, try serving the bars with a fruit compote, like a berry mix or a stewed apple. The tartness of the fruit will cut through the richness of the bars, creating a delightful flavor contrast. And if you're having a party, you can even serve them as part of a dessert platter, alongside other treats like cookies, cakes, and fresh fruit. The possibilities are endless, so don't be afraid to get creative. And most importantly, enjoy every single bite of your delicious banana brownie bars! They’re a labor of love, so you deserve to savor them.
Storage Method | Duration | Notes |
|---|---|---|
Room Temperature | 1-2 days | In an airtight container |
Refrigerator | Up to 1 week | If frosted |
Freezer | Up to 3 months | Wrapped individually |
Final Thoughts and Enjoyment
So there you have it, everything you need to know about storing and enjoying your banana brownie bars. From keeping them fresh to serving them in style, these bars are the perfect treat for any occasion. Whether you're having a cozy night in or hosting a party, they are sure to be a crowd-pleaser. And the best part? They're so easy to make, you can whip them up anytime you have some ripe bananas on hand. Baking is not just about making food, it's about creating memories. So, gather your ingredients, put on your favorite music, and get ready to fill your kitchen with the delicious smell of banana and chocolate.
Remember, cooking is a journey, not a destination. It's okay to make mistakes, and it's okay to experiment. The most important thing is to have fun and enjoy the process. So, go ahead and bake your heart out, and don't forget to share your creations with the people you love. And if you have any questions, don't hesitate to ask. Happy baking!
Wrapping Up Your Banana Brownie Bar Adventure
And there you have it, my friends, a batch of delightful banana brownie bars ready to be devoured. I hope you’ve enjoyed this baking journey as much as I enjoyed sharing it with you. This recipe is more than just a way to use up overripe bananas; it's about creating moments of joy and deliciousness. Whether you stick to the original recipe or get creative with mix-ins and toppings, remember that baking should be fun and a little messy. So, go ahead, share these treats with your loved ones, or keep them all to yourself – I won't judge! Happy baking and may your days be filled with gooey, chocolatey goodness.