Table of Contents
Ever find yourself torn between the comforting allure of banana bread and the decadent charm of a fudgy brownie? Well, what if I told you that you no longer have to choose? This banana bread brownie recipe is your answer! It's like a delicious mashup of two classic treats, creating a dessert that’s both familiar and surprisingly new. We're talking moist, banana-packed goodness with a rich, chocolatey center, making it the perfect treat for any occasion (or, let's be honest, just because). This isn't your average dessert; it's a flavor explosion that's super easy to whip up. Ready to ditch the dilemma and dive into the world of banana bread brownies? We'll guide you through each step, from mixing the batter to frosting those tempting squares. Get ready to bake a batch that will disappear faster than you can say "second slice!".
Mixing Up the Perfect Banana Bread Brownie Recipe
Mixing Up the Perfect Banana Bread Brownie Recipe
The Foundation of Flavor
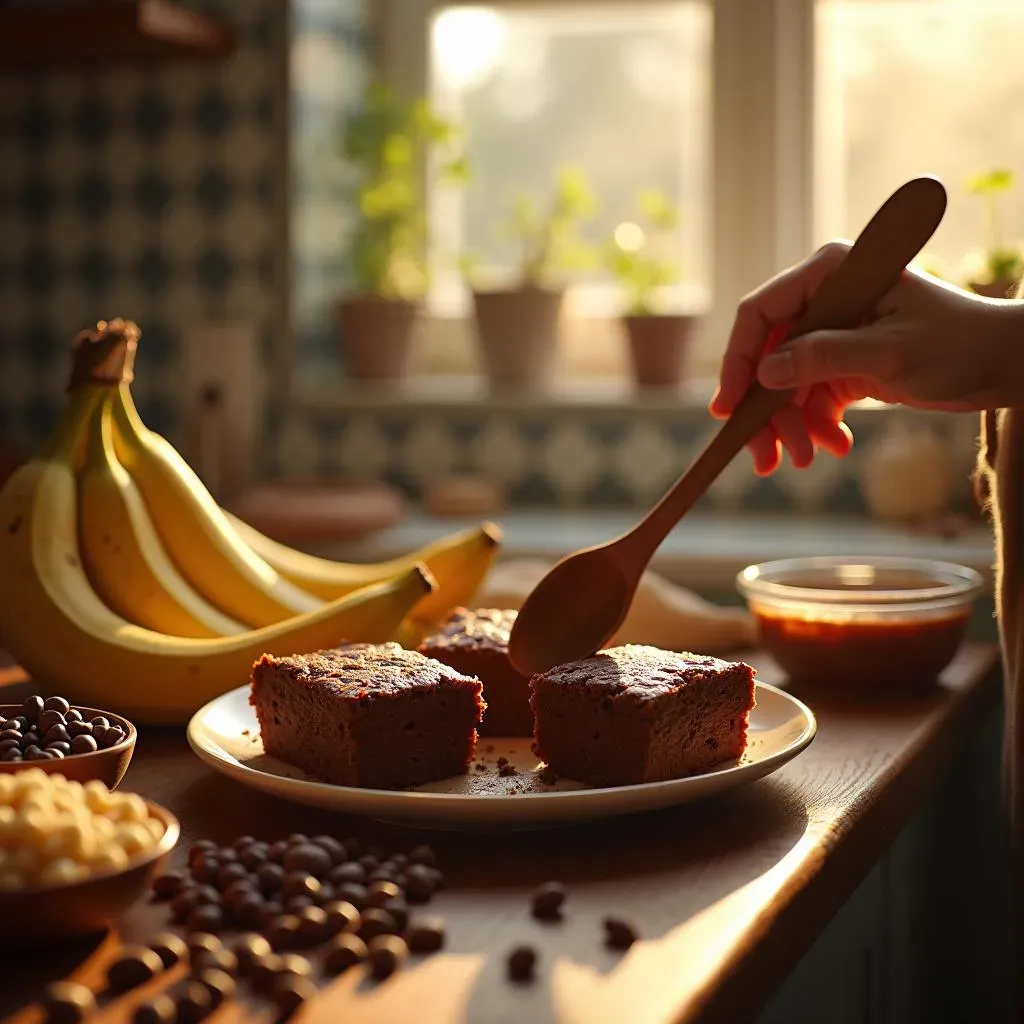
let's get down to the nitty-gritty of this banana bread brownie magic. First things first, you'll want to gather your ingredients. It's like prepping for a science experiment, but way tastier. We're talking about the usual suspects: sugar (both granulated and brown if you’re feeling fancy), butter (melted, because we're aiming for that gooey goodness), eggs, and of course, the stars of the show – ripe, mashed bananas. The riper the bananas, the sweeter and more flavorful your brownies will be, so don't be shy about using those spotty ones you've been ignoring on your counter. Oh, and don't forget a dash of vanilla extract for that extra oomph!
Now, for the secret weapon: sour cream or Greek yogurt. This is what keeps our brownies incredibly moist and gives them that perfect, tender crumb. It’s a game-changer, trust me. Think of it like adding a secret ingredient that makes everyone wonder, "What's your secret?". Once all these are in place, we gently whisk them together until everything is just combined. Don't overmix; we're not trying to make bread dough here. We want a batter that’s smooth but still has some character, kind of like a perfectly imperfect painting.
Ingredient | Why it's Important |
|---|---|
Ripe Bananas | Adds sweetness, moisture, and banana flavor |
Sour Cream/Greek Yogurt | Keeps brownies moist and tender |
Melted Butter | Adds richness and helps with texture |
Chocolate and Dry Ingredients
Alright, now that we've got the wet ingredients sorted, it's time to add the chocolate and the dry stuff. For chocolate, you can use cocoa powder for that classic brownie flavor, or melt some dark chocolate and add it in for a richer, deeper taste. I personally prefer the latter because, well, more chocolate is always better, right? After that, we're going to gently fold in the dry ingredients: flour, a pinch of salt, and baking soda. Don’t just dump everything in at once; we want to mix it in slowly to avoid overmixing. Overmixing can lead to tough brownies, and nobody wants that.
The goal here is to create a batter that's thick and luscious, like melted chocolate lava. We want it to be smooth, but not runny. It should look like something you'd want to dive into, face first. Once the batter is ready, you can add optional extras like chocolate chips or chopped walnuts. It's your canvas, so go wild! Just remember to mix these in gently, so they don't sink to the bottom during baking. And that's it for the mixing part; easy peasy, right? Now, onto the baking!
“The secret ingredient is always love, but a little extra chocolate doesn't hurt.” - Anonymous Baker
Baking Your Banana Bread Brownies to Perfection
Baking Your Banana Bread Brownies to Perfection
Prepping for the Oven
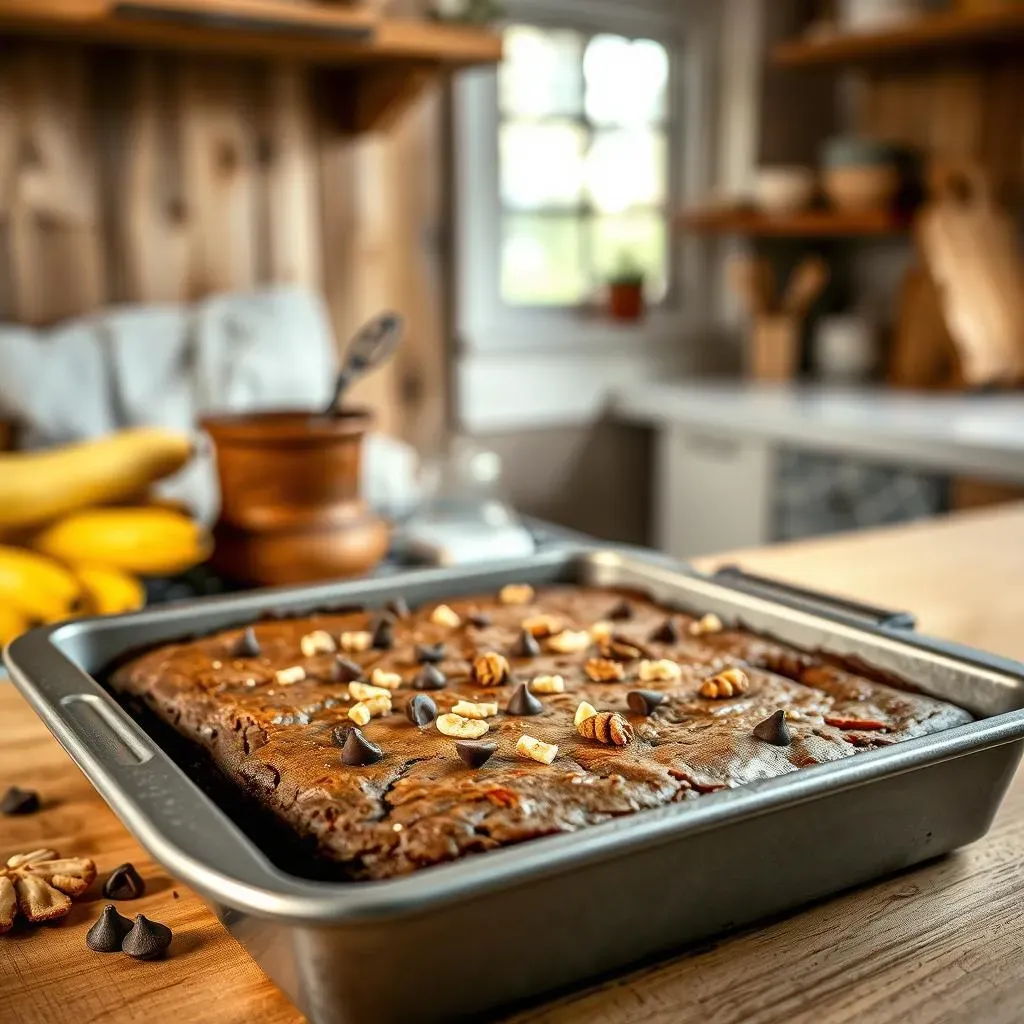
Alright, the batter is ready, and now it’s showtime! Before we get all excited about baking, let’s make sure we’ve got our stage set. You'll need a 9x13 inch baking pan. Grease it well, or even better, line it with parchment paper. This is not just for decoration; it makes removing the brownies a breeze after they're baked. Trust me, you don't want to be wrestling with a sticky mess later. It’s like setting up your chessboard before a game; a little prep goes a long way.
Once the pan is ready, pour in your batter, and spread it evenly. You want a consistent layer, so every bite is just as good as the last. If you’ve added any extra toppings, like nuts or chocolate chips, you might want to give them a gentle press into the batter, so they don’t just sit on top and burn. Now, we're ready to bake. Preheat your oven to 350°F (175°C). It’s crucial that the oven is at the right temperature, otherwise, you might end up with brownies that are either undercooked or overcooked. Patience is key here; let the oven do its thing.
Step | Why It's Important |
|---|---|
Grease/Line Pan | Prevents sticking and makes removal easy |
Even Batter Layer | Ensures consistent baking |
Preheated Oven | Guarantees even cooking |
The Baking Process
the oven is preheated, the batter is in the pan, and now it’s time for the main event. Gently slide that pan into the oven and let it bake for about 25-30 minutes. The baking time might vary depending on your oven, so keep a close watch. You’ll know they’re ready when the edges are set and a toothpick inserted into the center comes out with a few moist crumbs attached. We're not looking for a perfectly clean toothpick here; a few moist crumbs means they're still fudgy and delicious.
It's tempting to open the oven door and peek, but resist the urge. Every time you open the door, you’re letting out heat, which can mess with the baking process. So just sit back, relax, and let the oven work its magic. While you wait, maybe do a little dance, or prepare the frosting. Once they’re out of the oven, let them cool in the pan for a while before you even think about cutting into them. This helps them set and makes them easier to handle.
“Good things come to those who bake.” - Unknown
Cooling and Setting
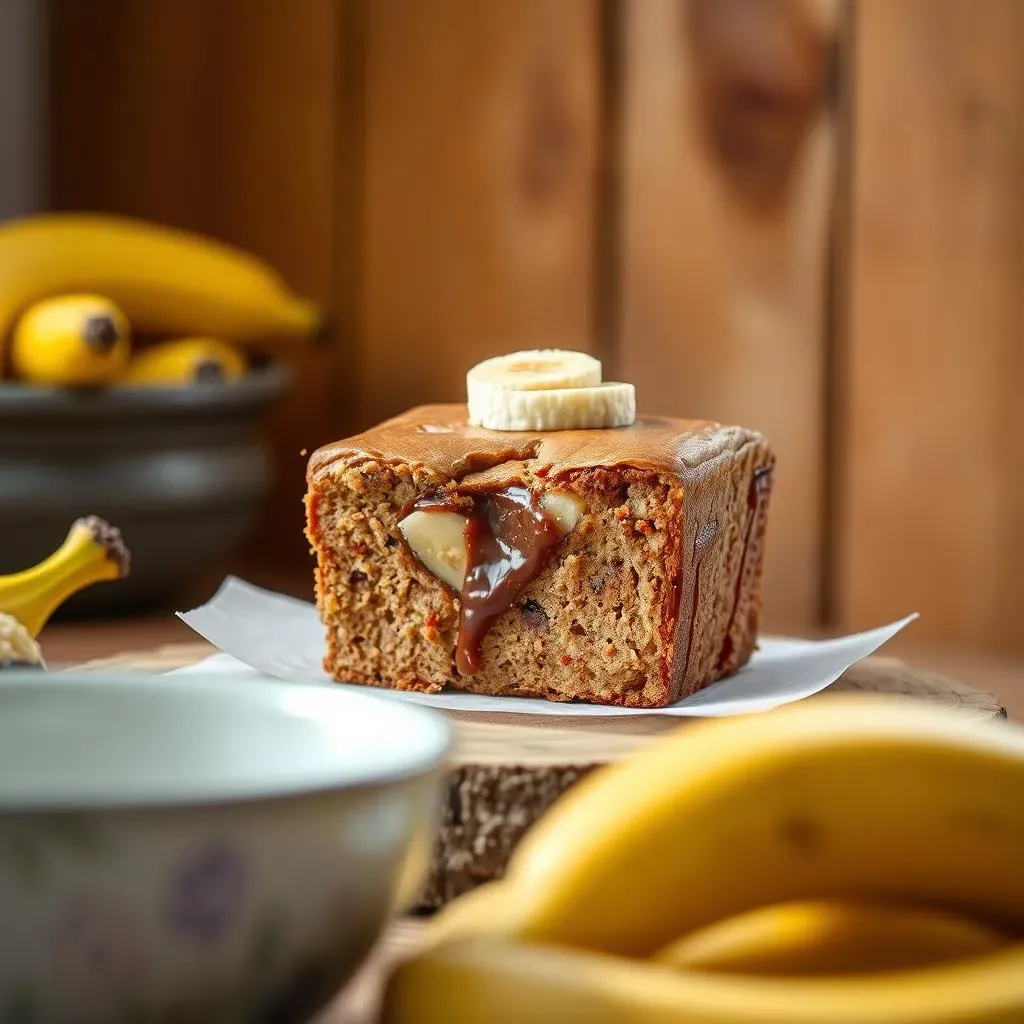
so your banana bread brownies are out of the oven, smelling amazing, and you’re probably already drooling. But hold your horses! The cooling process is just as important as the baking. Let the brownies cool in the pan for at least 30 minutes. This allows them to set properly and makes them easier to cut into those perfect squares or whatever shape your heart desires. If you’re impatient, you might end up with a gooey mess, and nobody wants that.
Once they’ve cooled a bit, you can carefully lift them out of the pan using the parchment paper (if you used it) and place them on a cutting board. Now, you can slice them up and admire your handiwork. Look at that perfect texture, that rich color, and that tempting smell. You’ve officially baked a batch of banana bread brownies that are going to be the talk of the town. Or at least, the talk of your kitchen. Now, let's move on to the frosting, because, let’s face it, no brownie is complete without a little extra love on top!
Frosting and Serving Your Banana Bread Brownie
Frosting and Serving Your Banana Bread Brownie
The Brown Butter Magic
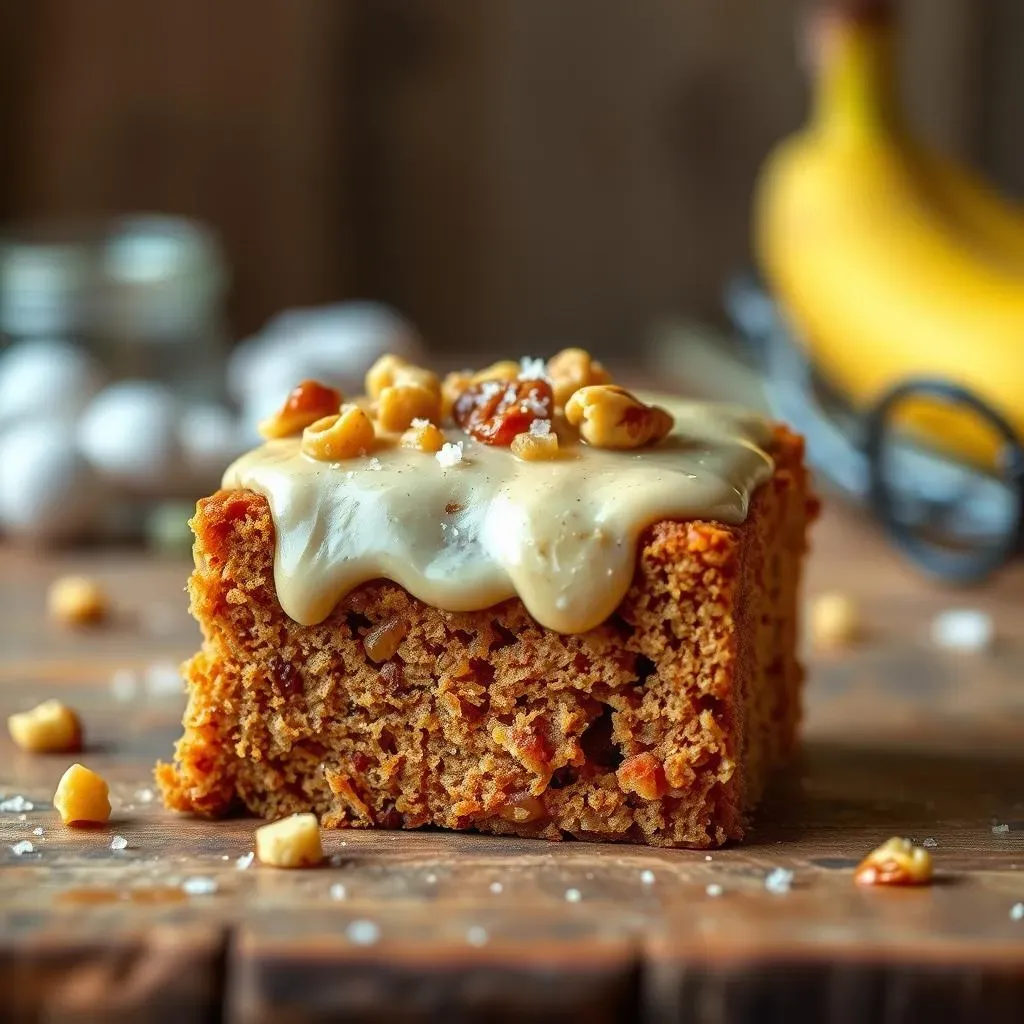
Alright, let's talk frosting, because what's a brownie without a little extra sweetness on top? For this banana bread brownie, we're going all out with a brown butter glaze. If you've never made brown butter before, don't worry, it's not as fancy as it sounds. You just melt butter in a saucepan over medium heat, and keep cooking it until it turns a lovely golden brown color and starts smelling nutty. It's like the butter is going through a transformation, and it’s amazing to watch (and smell!).
Once the butter is browned, take it off the heat and whisk in some powdered sugar and a splash of milk or cream. Keep whisking until you have a smooth and glossy glaze. If it's too thick, add a little more milk, if it's too thin, add a little more sugar. It's all about finding that perfect consistency. This brown butter glaze adds a nutty, caramel-like flavor that perfectly complements the banana and chocolate in the brownies. It's not just a topping; it's a flavor enhancer.
Applying the Frosting
Now that you have this glorious brown butter frosting, it’s time to get it onto those brownies. Make sure the brownies have cooled completely before you start frosting them, otherwise the frosting will melt right off. You can use a spoon or a spatula to spread the frosting evenly over the top. Don’t be shy with it; we want every bite to have a little bit of that brown butter goodness.
If you want to get fancy, you can drizzle the frosting over the brownies instead of spreading it. This creates a more rustic and elegant look. Once the frosting is on, you can add some extra toppings if you’re feeling adventurous. Some chopped nuts, a sprinkle of sea salt, or even a few chocolate shavings can take these brownies to the next level. It’s all about adding those little touches that make them extra special.
Frosting Step | Why it matters |
|---|---|
Cool Brownies | Prevents melting |
Even Spread | Makes every bite perfect |
Optional Toppings | Adds extra flavor and texture |
Serving and Storing
Alright, the frosting is on, the brownies look amazing, and now it's time to serve them up. You can cut them into squares, rectangles, or even triangles if you’re feeling rebellious. It’s all about presentation. And while they are delicious on their own, you can definitely pair them with a scoop of vanilla ice cream or a dollop of whipped cream for an extra treat. Think of it like a sundae, but with brownies instead of cake.
If you happen to have any leftovers (which is highly unlikely), you can store them in an airtight container at room temperature for a few days or in the fridge for a little longer. Just make sure they're completely cooled before storing them to avoid any condensation. And if you want to make them ahead of time, you can freeze the brownies (without frosting) for up to a month. Just thaw them out before frosting and serving. Now go forth and share your banana bread brownie masterpieces with the world – or at least with your friends and family.
"Life is what you bake it." - Unknown
Wrapping Up Your Banana Bread Brownie Adventure
So there you have it, a banana bread brownie recipe that’s as simple to make as it is delightful to eat. From the sweet aroma filling your kitchen to the first bite of that fudgy, banana-infused goodness, it's a baking experience worth repeating. Whether you’re a seasoned baker or just starting out, this recipe is designed to be foolproof and fun. Don't be afraid to experiment with those add-ins, maybe some extra chocolate chips or a sprinkle of sea salt? The possibilities are endless. Now go on, bake a batch, share the joy, and maybe, just maybe, save a piece for yourself.